IBM Watsonx as a Custom Component for LangFlow
Table of Contents generated with DocToc
IBM Watsonx as a Custom Component for LangFlow
Background
In the blog Building an AI ChatBot for Private Knowledge Base with LangFlow, we talked something about how to build a private knowledge base with LangFlow, also mentioned Watsonx can be integrated with LangFlow as a Custom component.
In this blog, we will share some detail of how to build Watsonx as a Custom component and integrate with LangFlow to enable end user can drag-and-drop Watsonx in order to build applications based on Watsonx.
What is LangFlow Custom Component
In Langflow, a Custom Component is a special component type that allows users to extend the platform’s functionality by creating their own reusable and configurable components.
A Custom Component is created from a user-defined Python script that uses the CustomComponent class provided by the Langflow library. These components can be as simple as a basic function that takes and returns a string or as complex as a combination of multiple sub-components and API calls.
Let’s take a look at the basic rules and features. Then we’ll go over an example.
The rules for building a customer component are as follows.
Rule1
The script must contain a single class that inherits from CustomComponent.
Rule2
This class requires a build method used to run the component and define its fields.
The Return Type Annotation of the build method defines the component type (e.g., Chain, BaseLLM, or basic Python types). Check out all supported types in the component reference.
Rule3
The class can have a build_config method, which defines configuration fields for the component. The build_config method should always return a dictionary with specific keys representing the field names and their corresponding configurations. It must follow the format described below:
- Top-level keys are field names.
- Their values are also of type dict. They specify the behavior of the generated fields.
Check out the component reference for more details on the available field configurations.
Watsonx Custom Component
With above rules for a Custom component, we can build a Watsonx Python Script to wrapper Watsonx as a Custom component.
Here is the Python Script.
from langflow import CustomComponent
from langchain.schema import Document
from typing import Optional
from langchain.llms.base import BaseLLM

from genai.extensions.langchain import LangChainInterface
from genai.schemas import GenerateParams
from genai.credentials import Credentials

class Watsonx(CustomComponent):
    display_name = "Watsonx"
    description = "Watsonx foundation models"
    beta = False

    def build_config(self) -> dict:
        model_options = [
            # Part of the officially supported foundation models in watsonx.ai
            "bigcode/starcoder",
            "bigscience/mt0-xxl",
            "eleutherai/gpt-neox-20b",
            "google/flan-t5-xxl",
            "google/flan-ul2",
            "ibm/mpt-7b-instruct2",
            "meta-llama/llama-2-70b-chat"
        ]

        decoding_options = [
            "sample",
            "greedy"
        ]

        return {
            "model_name": {
                "display_name": "Model Name",
                "options": model_options,
                "value": model_options[0],
                "info": "The ID of the model or tune to be used for this request."
            },
            "api_endpoint": {
                "display_name": "API Endpoint",
                "info": "api endpoint for watsonx"
            },
            "api_key": {
                "display_name": "API Key",
                "password": True,
                "info": "API uses API keys for authentication."
            },
            # "api_endpoint": { "display_name": "API Endpoint", "value": "https://bam-api.res.ibm.com/v1/" },
            "decoding_method": {
                "display_name": "Decoding Method",
                "options": decoding_options,
                "value": decoding_options[0],
                "info": "Represents the strategy used for picking the tokens during generation of the output text."
            },
            "max_new_tokens": {
                "display_name": "Max New Tokens",
                "value": 1500,
                "info": "The maximum number of new tokens to be generated."
            },
            "temperature": {
                "display_name": "Temperature",
                "value": 1,
                "info": "A value used to modify the next-token probabilities in sampling mode."
            },
            "code": {"show": False}
        }

    def build(
        self,
        model_name: str,
        api_key: str,
        api_endpoint: str,
        decoding_method: str,
        max_new_tokens: int,
        temperature: int,
    ) -> BaseLLM:
        creds = Credentials(api_key, api_endpoint)
        params = GenerateParams(decoding_method=decoding_method, max_new_tokens=max_new_tokens, temperature=temperature)
        model = LangChainInterface(model=model_name, params=params, credentials=creds)
        return model
From above, we can see there are mainly two methods in the code:
- The
build_configfunction is used to define how the drag-and-drop box will look like and what kind of parameters will be contained in the drag-and-drop box for watsonx. - The
buildfunction is used to define what will be the return value of this LangFlow Custom component, in our Watsonx example, we are usingBaseLLMas the return value.
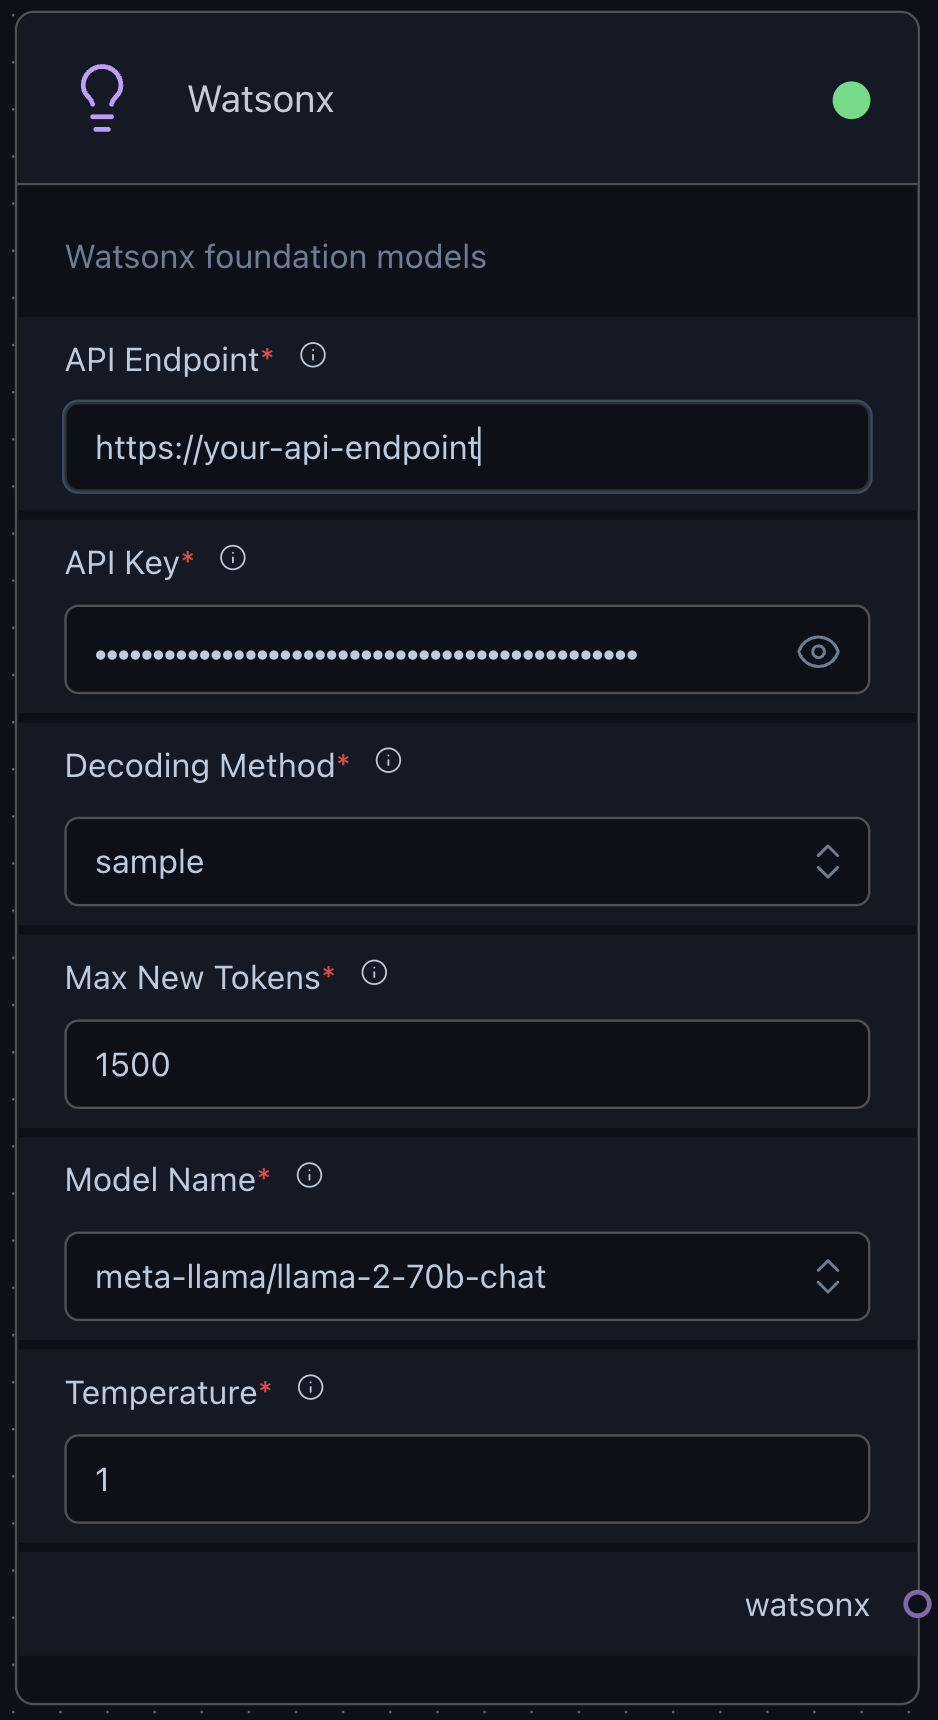
The following picture is how the Watsonx drag-and-drop box looks like with the definition in build_config` function.
Run LangFlow with Watsonx
Start LangFlow with Custom Component
- First, we need to save the above Python Script to a folder named as llms (The name must be llms, this can enable the Watsonx drag-and-drop box can be listed under the category of llms in langflow UI), you can name the file with the name as you want. In my env, I was using file name as watsonx.py
guangyaliu@Guangyas-MacBook-Pro-2 new-components % tree
.
├── custom_components
│   ├── prompt_generator.py
│   └── prompt_llm.py
└── llms
    └── watsonx.py
2 directories, 3 files
guangyaliu@Guangyas-MacBook-Pro-2 new-components % pwd
/Users/guangyaliu/go/src/github.com/gyliu513/langX101/tree/main/langflow/new-components
- Start LangFlow with a parameter of components-path to sepcify where is Watsonx Custom Component as follows.
langflow run --components-path=/Users/guangyaliu/go/src/github.com/gyliu513/langX101/tree/main/langflow/new-components
Login to LangFlow and Create App with Watsonx
After you login to LangFlow UI, you will see under the llms category, there is a new component named as Watsonx, that is the Watsonx Custom Component that we just created.
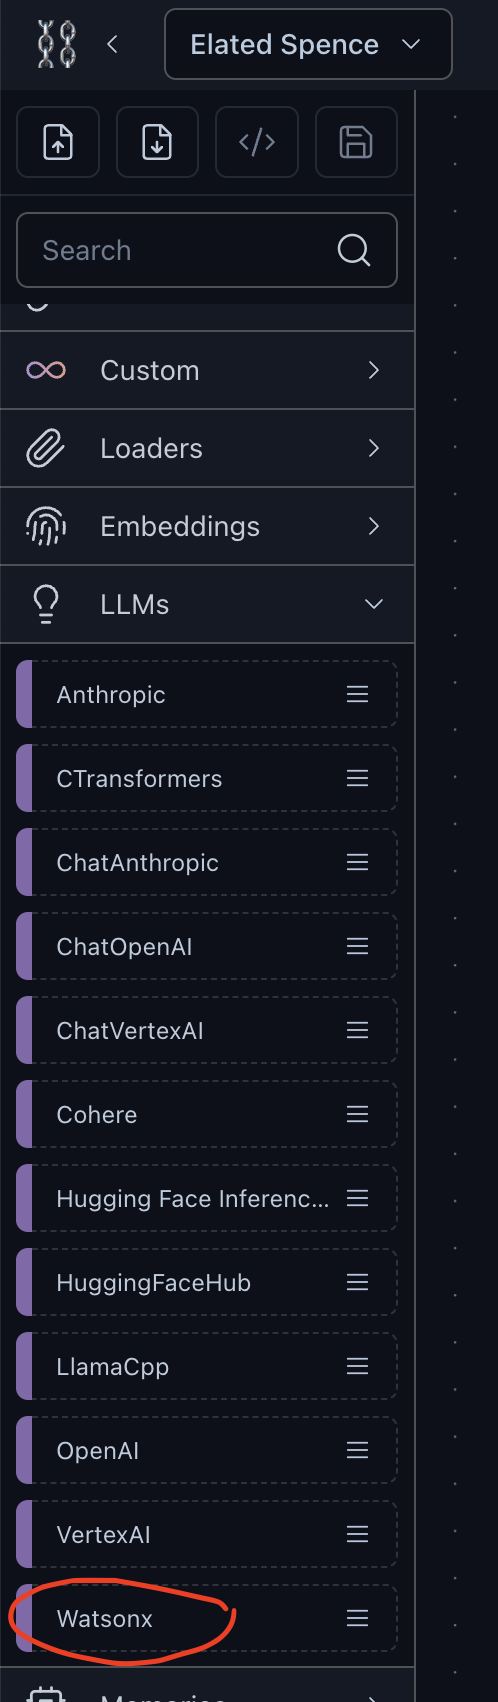
With this, we can drag-and-drop the Watsonx box to the FLanglow canvas and build apps based on Watsonx.
Let’s continue to use the App that we created for Building an AI ChatBot for Private Knowledge Base with LangFlow, but only need to change the ChatOpenAI to Watsonx, and change the OpenAIEmbeddings to HuggingfaceEmbeddings as follows:
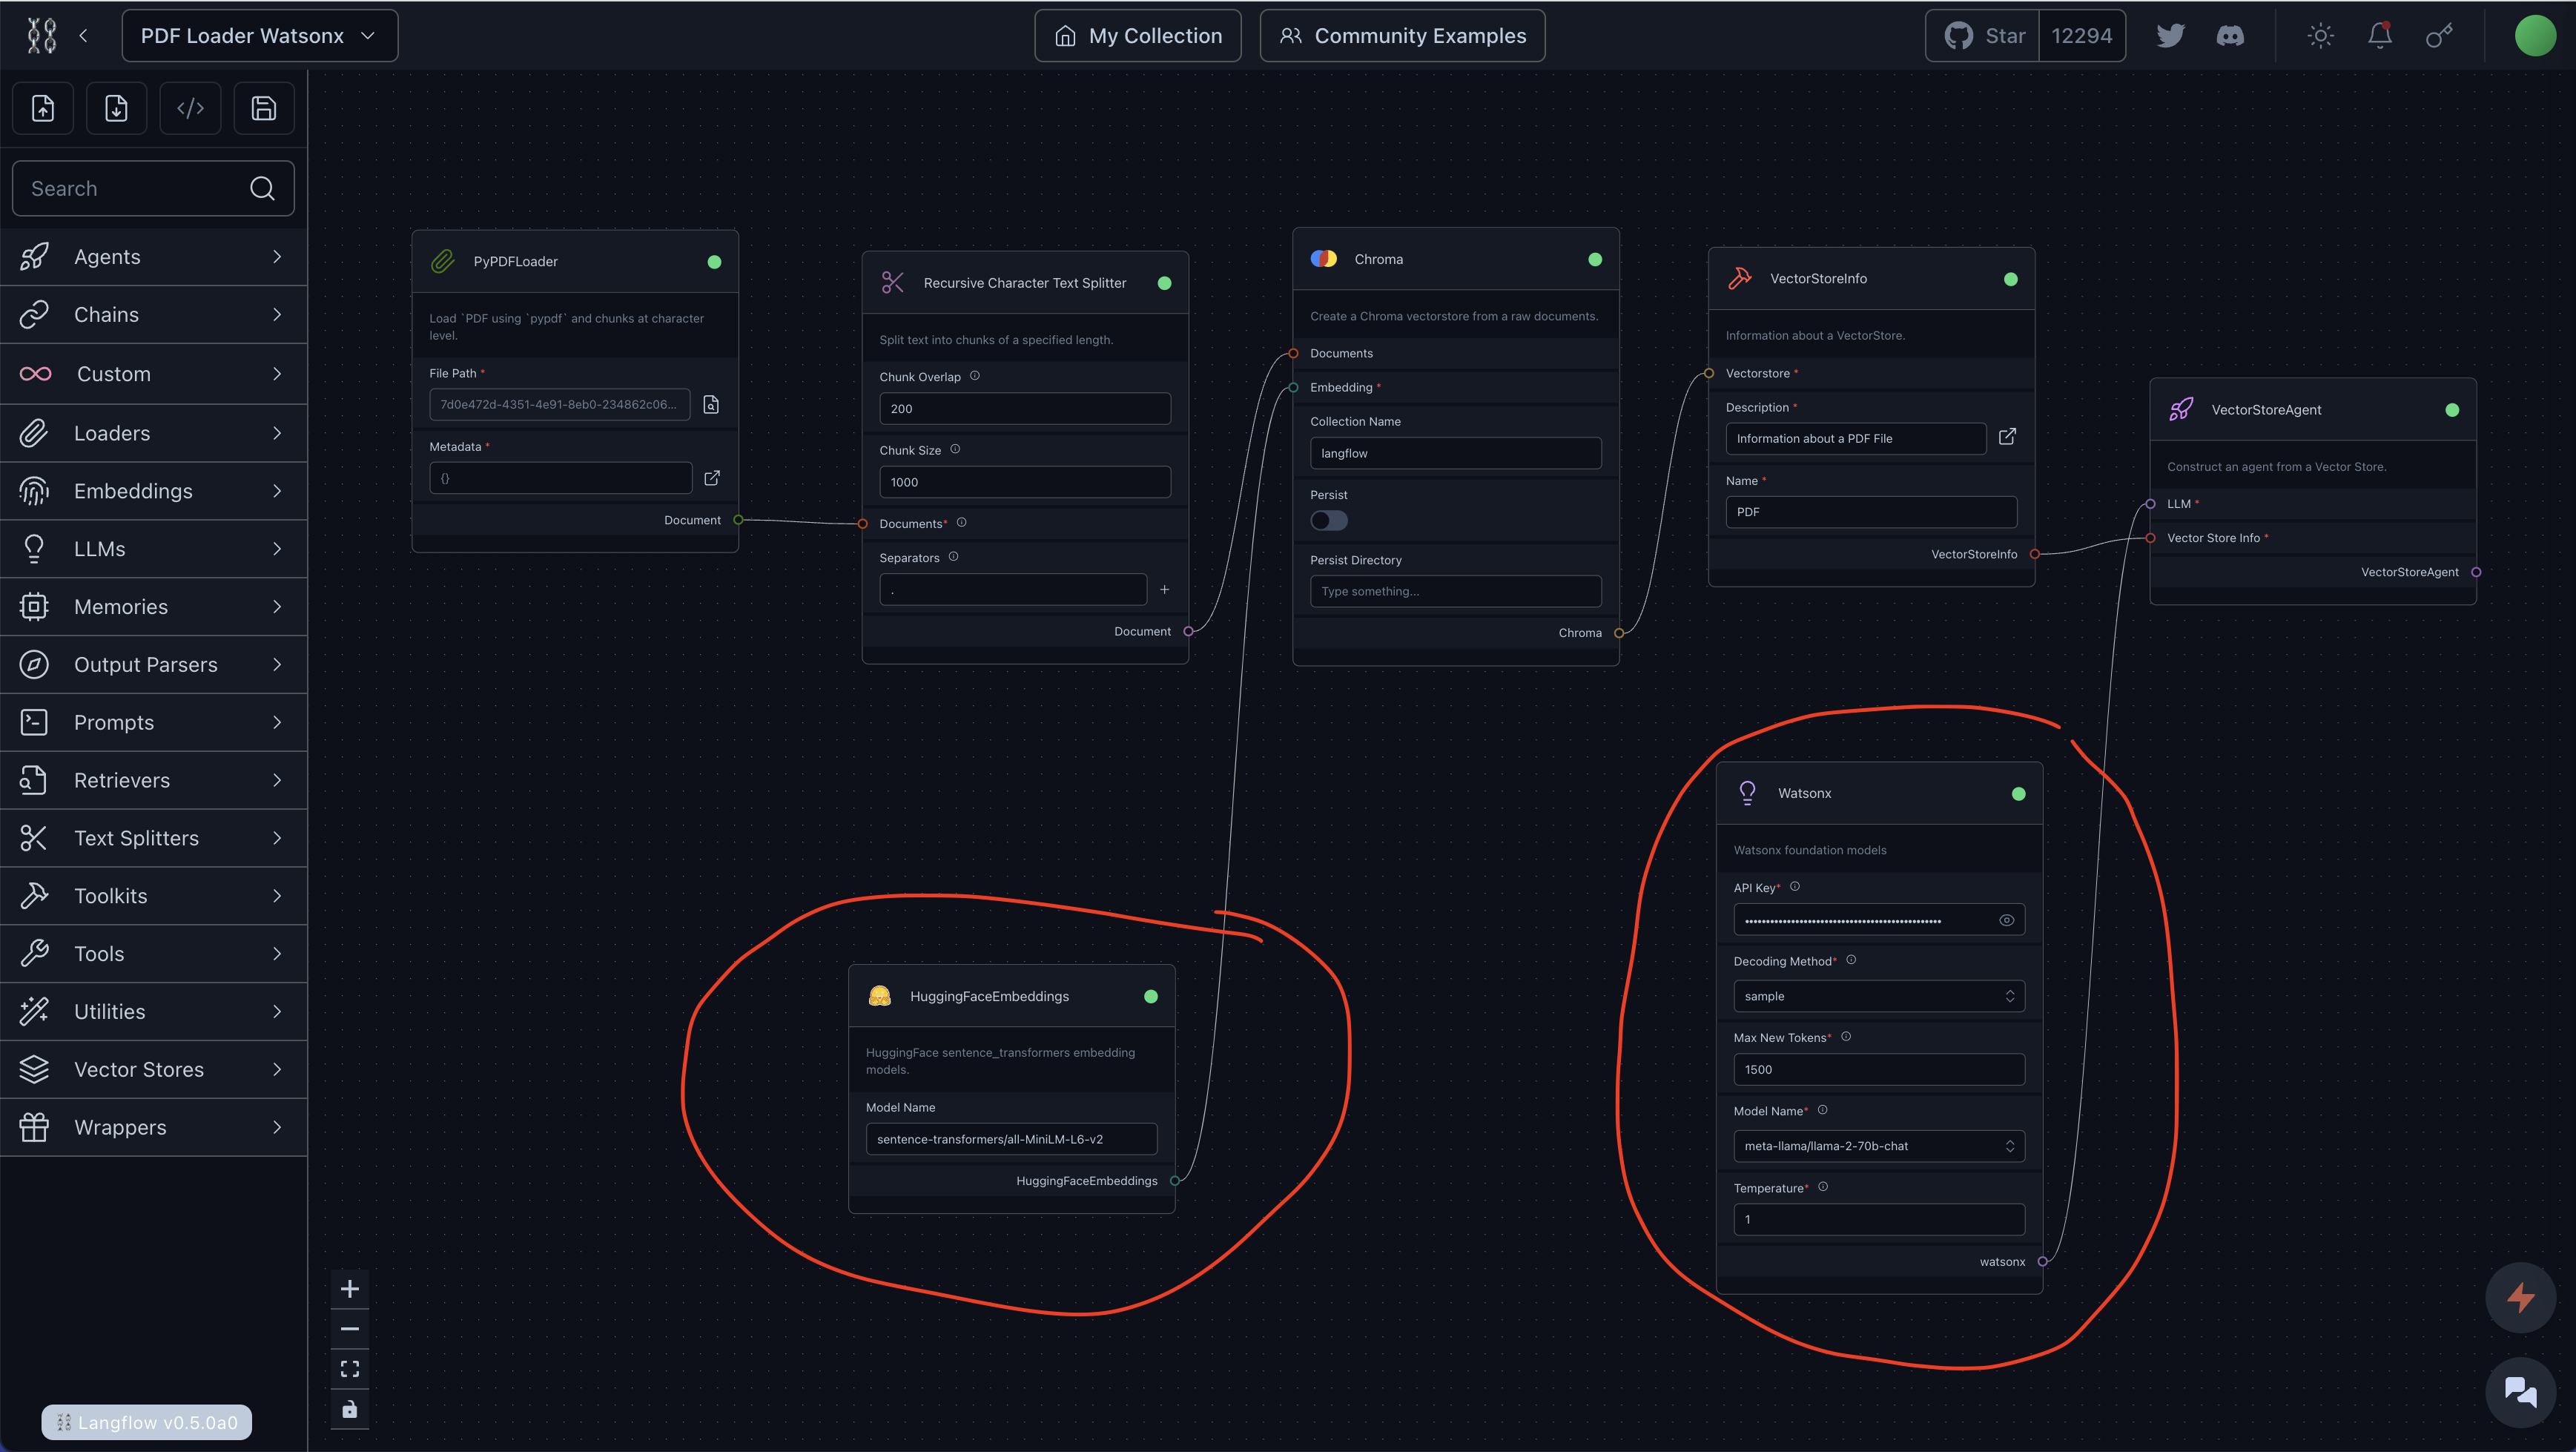
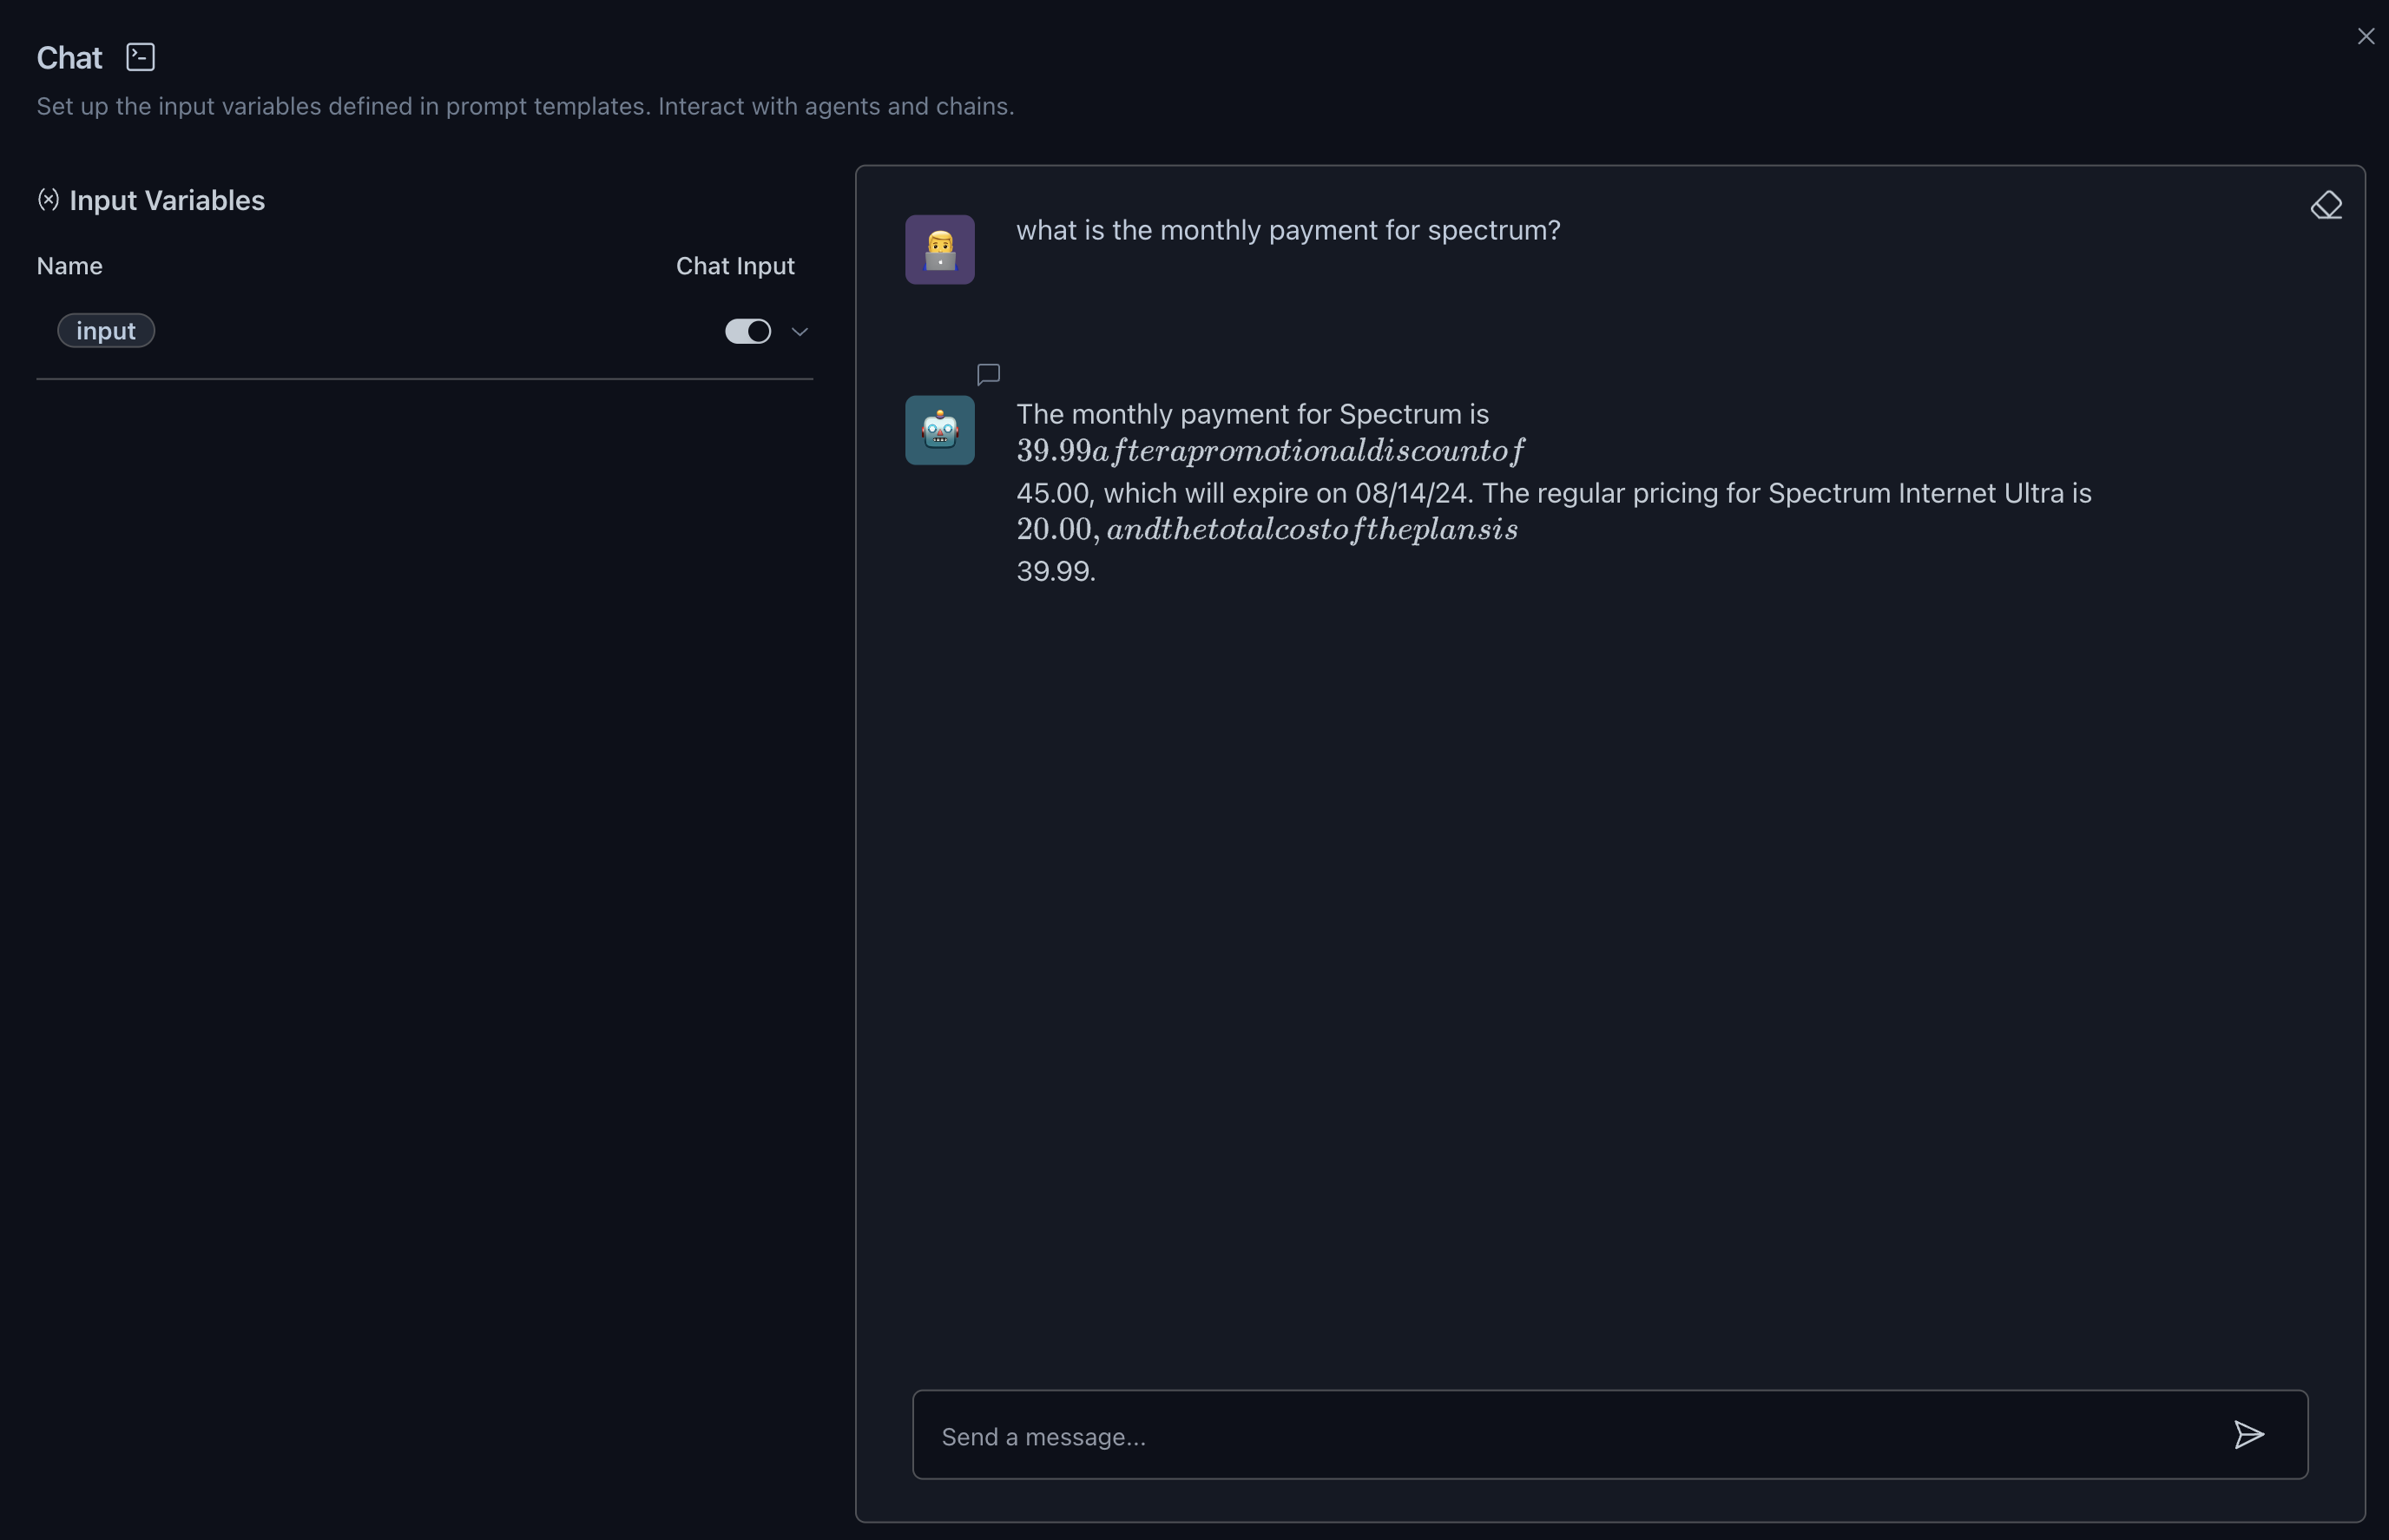
Then you can build and run the application by starting the ChatBox.
Conclusion
With Watsonx Custom Component, we can enable Watsonx as an integration component for LangFlow and enable customer to build their own apps based on Watsonx quickly without writing code.
LangFlow can enable seamless integration with IBM Watsonx, and everyone can build their own ChatBots based on different LLMs from IBM Watsonx and open source community, the ChatBots can even do some actions with LangChain Agent, like grab the top news for today, weather for today from internet etc.