Developer Quick Start with MCP Server in VS Code
Table of Contents generated with DocToc
Developer Quick Start with MCP Server in VS Code
GitHub Copilot Chat now supports Chat Agent Mode, allowing your MCP Server to respond to user questions within the VS Code chat interface. You can use this to extend GitHub Copilot Chat with custom intelligence from your observability platform, application, or tool. More importantly, it is FREE!
You can refer to Use agent mode in VS Code and Use MCP servers in VS Code (Preview) to get more detail.
In this blog, I will use the mcp filesystem server as an example to show a quick tutorial for setting this up in your VS Code.
Enable Agent Mode for VS Code
In agent mode, Copilot operates autonomously and determines the relevant context for your prompt.
You can access agent mode from the chat mode dropdown in the Chat view. Follow these steps to get started:
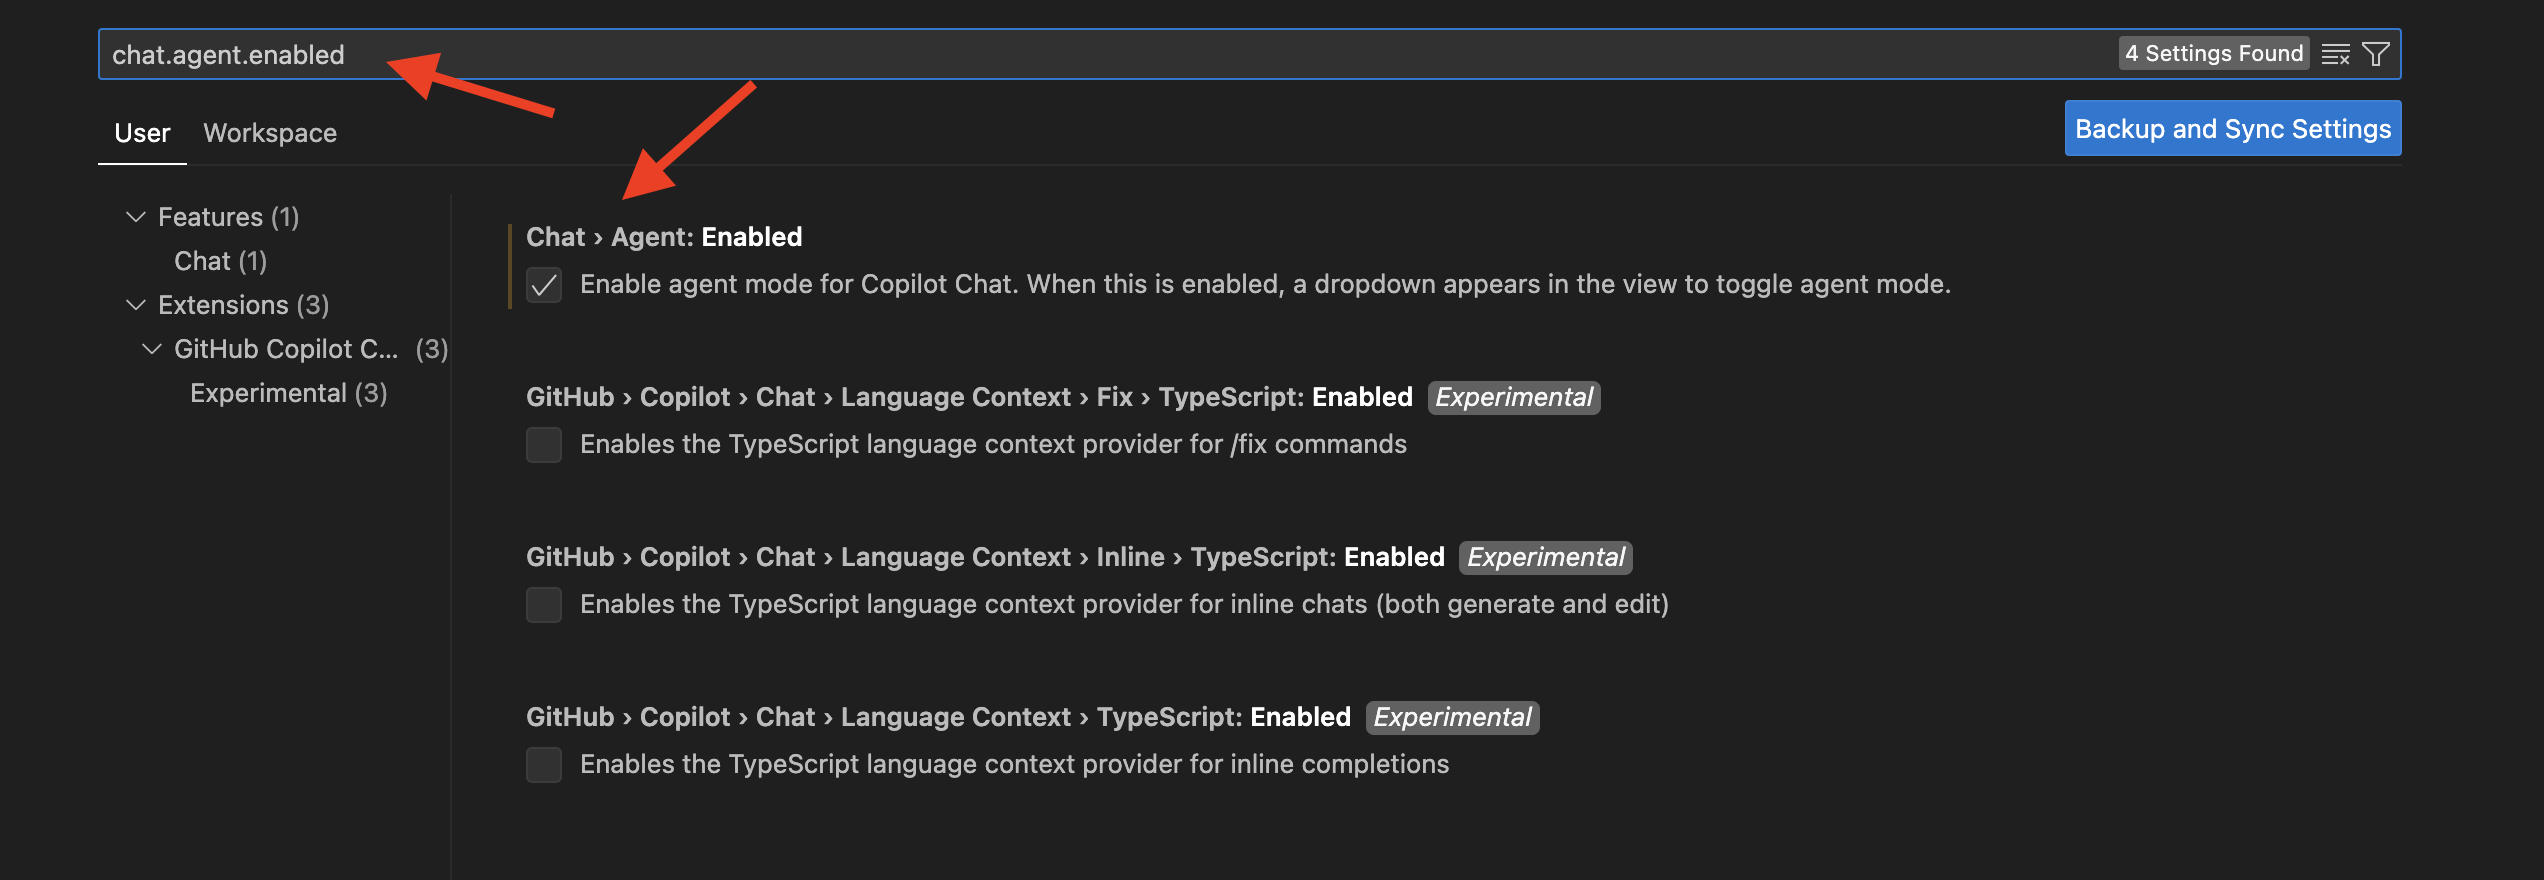
- Make sure that agent mode is enabled by configuring the
chat.agent.enabledsetting in theSettingseditor (requires VS Code 1.99 or later).
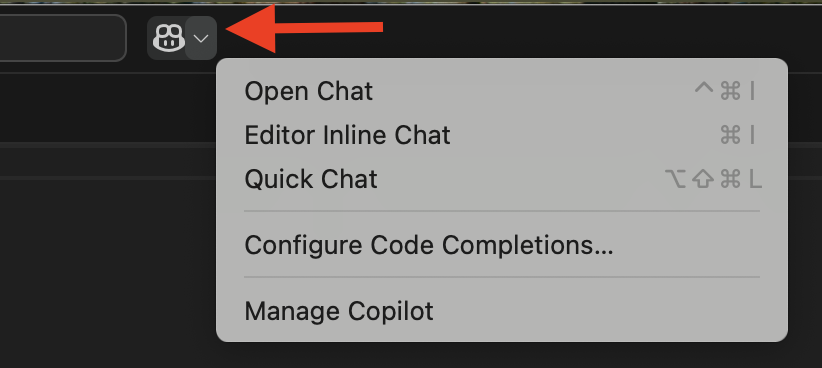
- Open the Chat view by selecting Open Chat from the Copilot menu in the VS Code title bar, or use the ⌃⌘I keyboard shortcut.
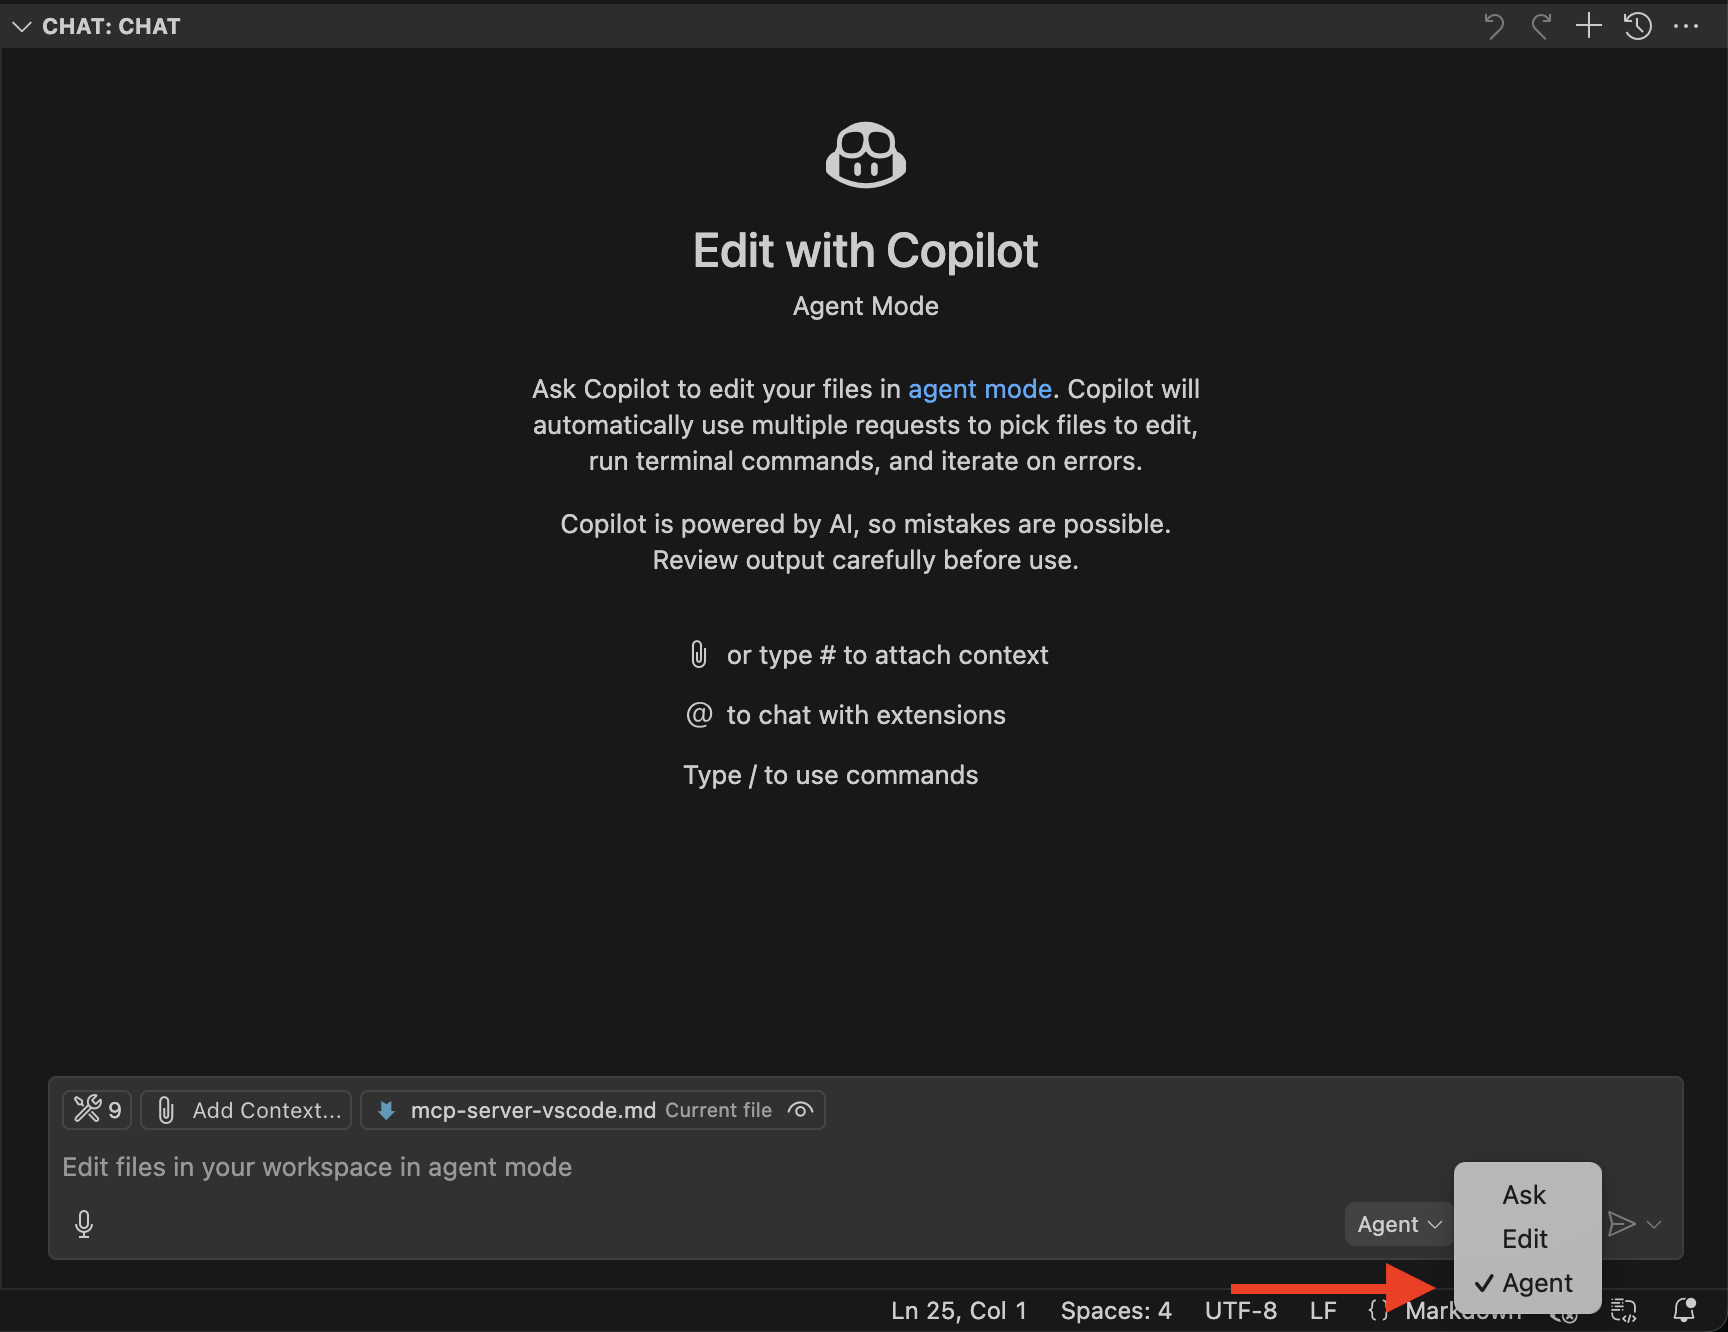
- Select
Agentfrom the chat mode dropdown in the Chat view.
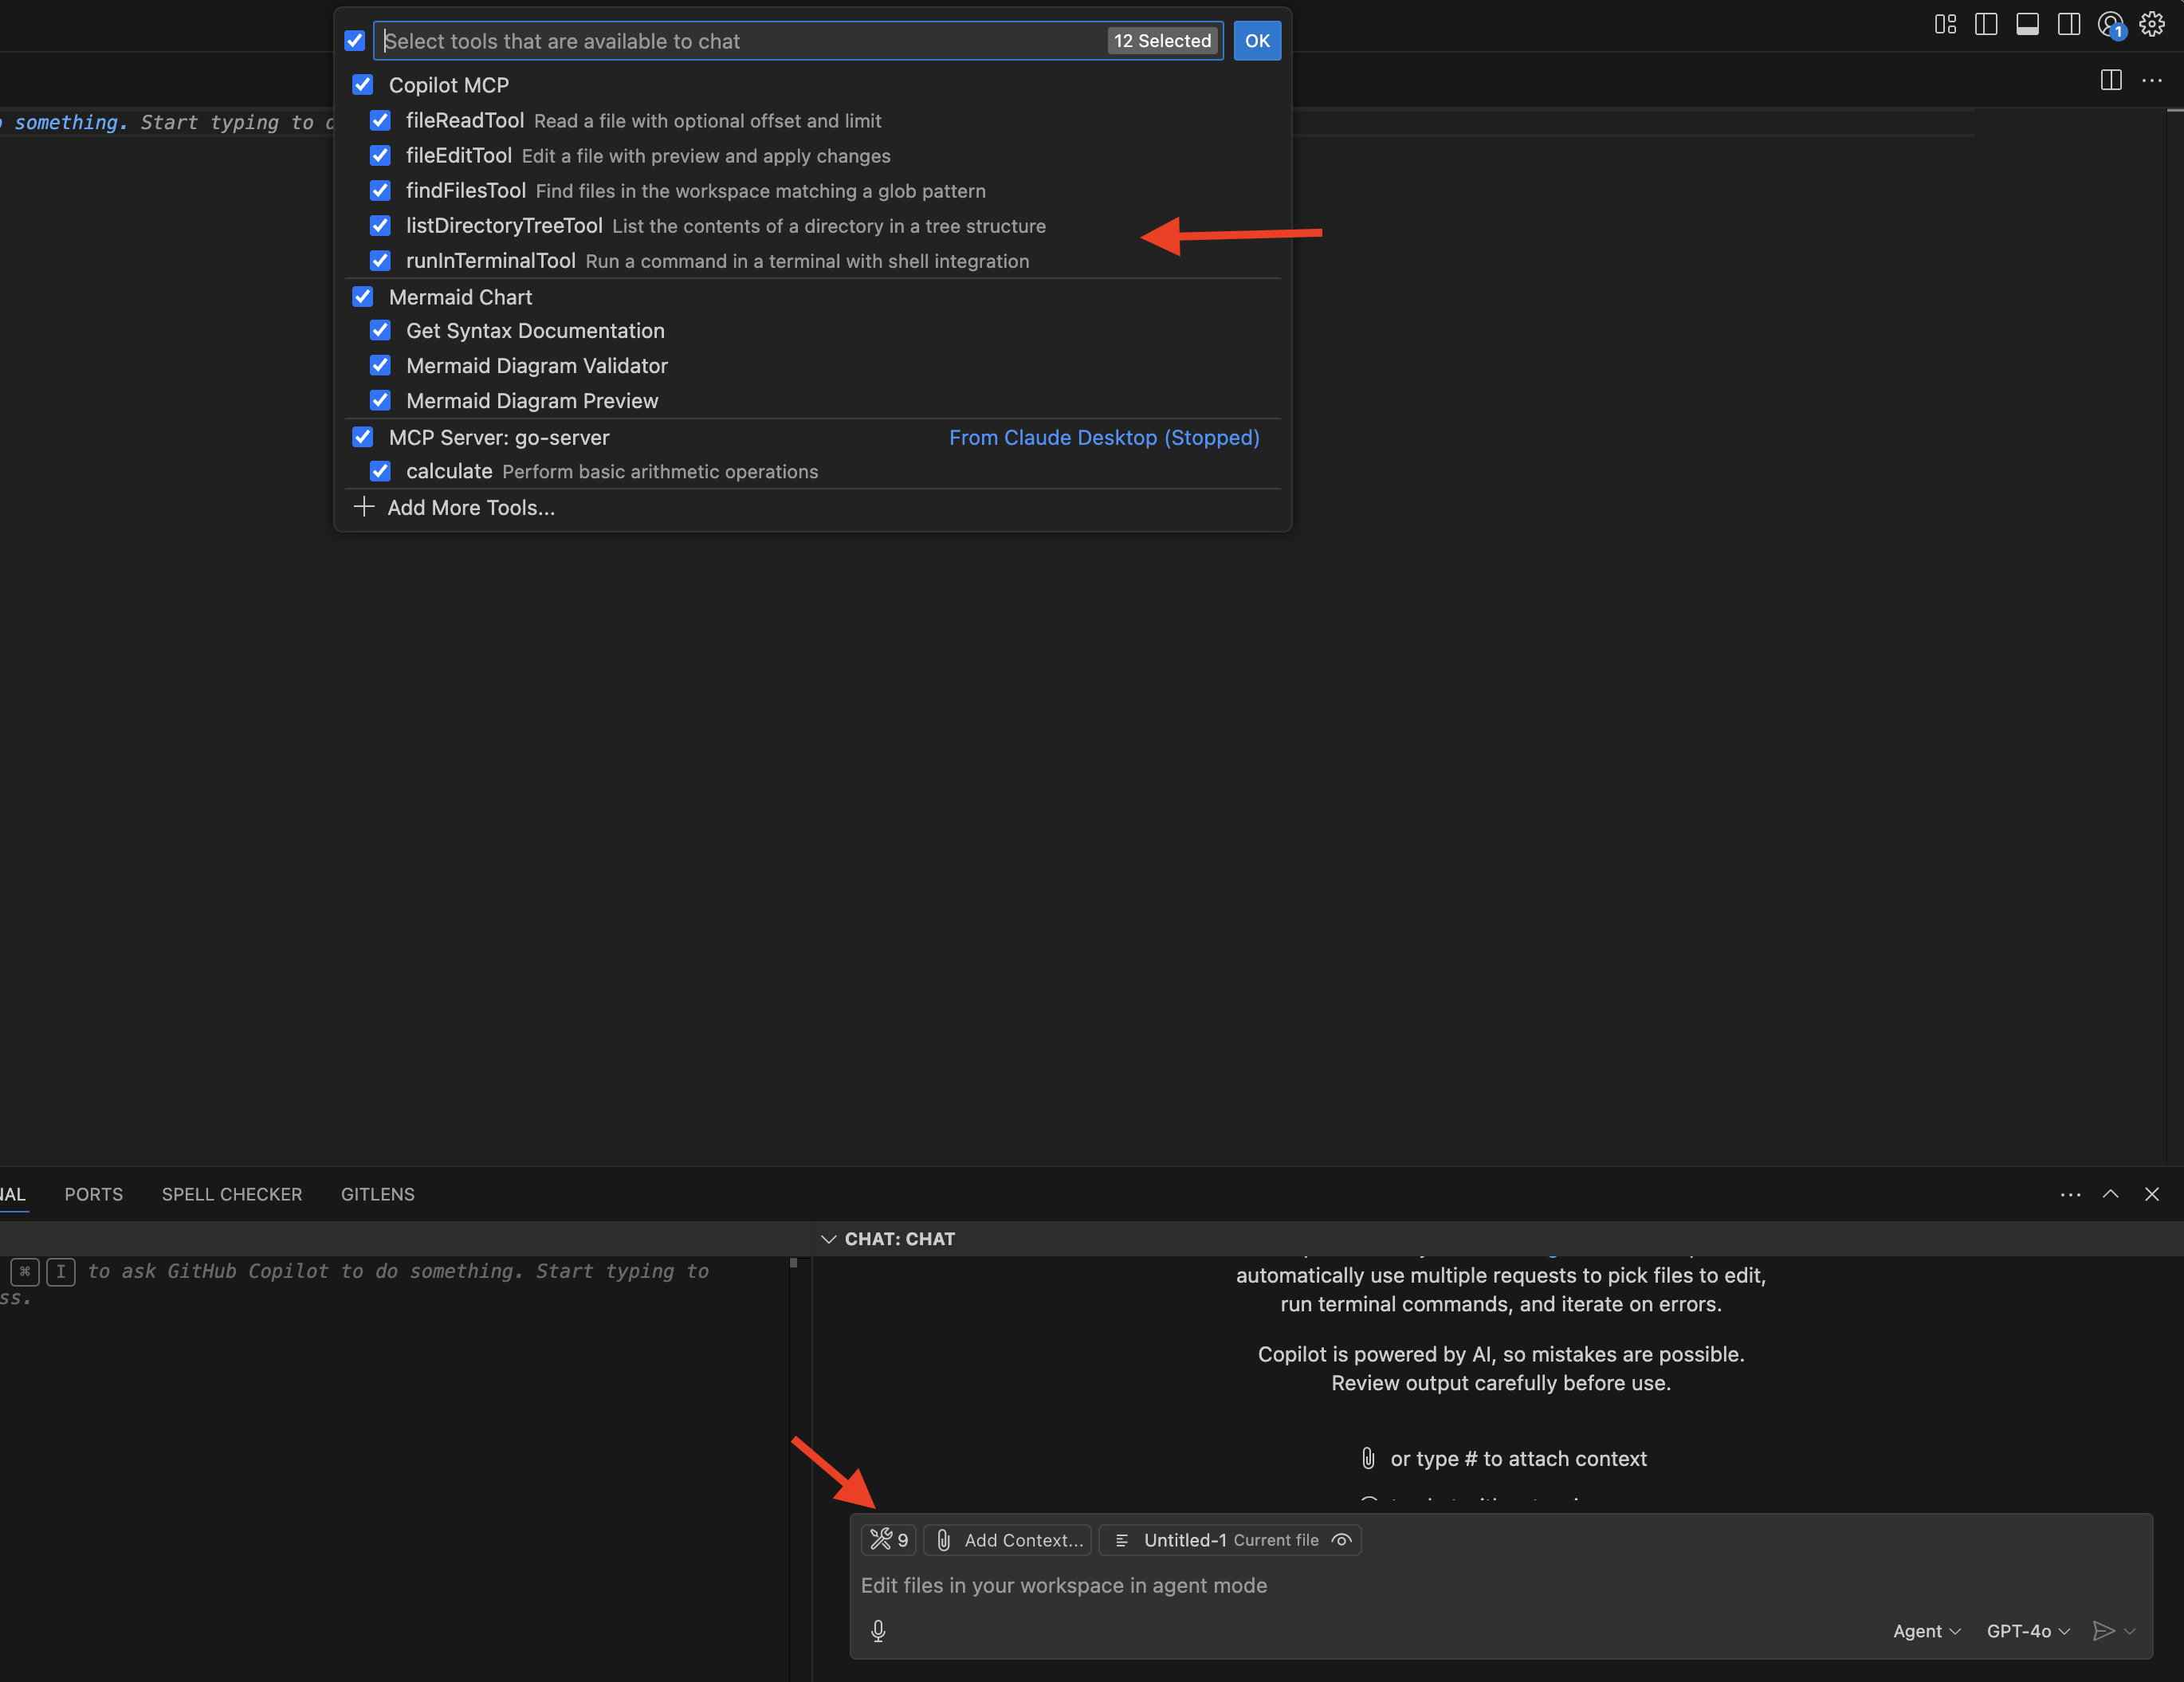
- Agent mode might invoke multiple tools to accomplish different tasks. Optionally, select the Tools icon to configure which tools can be used for responding to your request.
Config MCP Server
Alright, we have enabled Agent mode for VS Code, now we can integrate it with the mcp filesystem server and do some test.
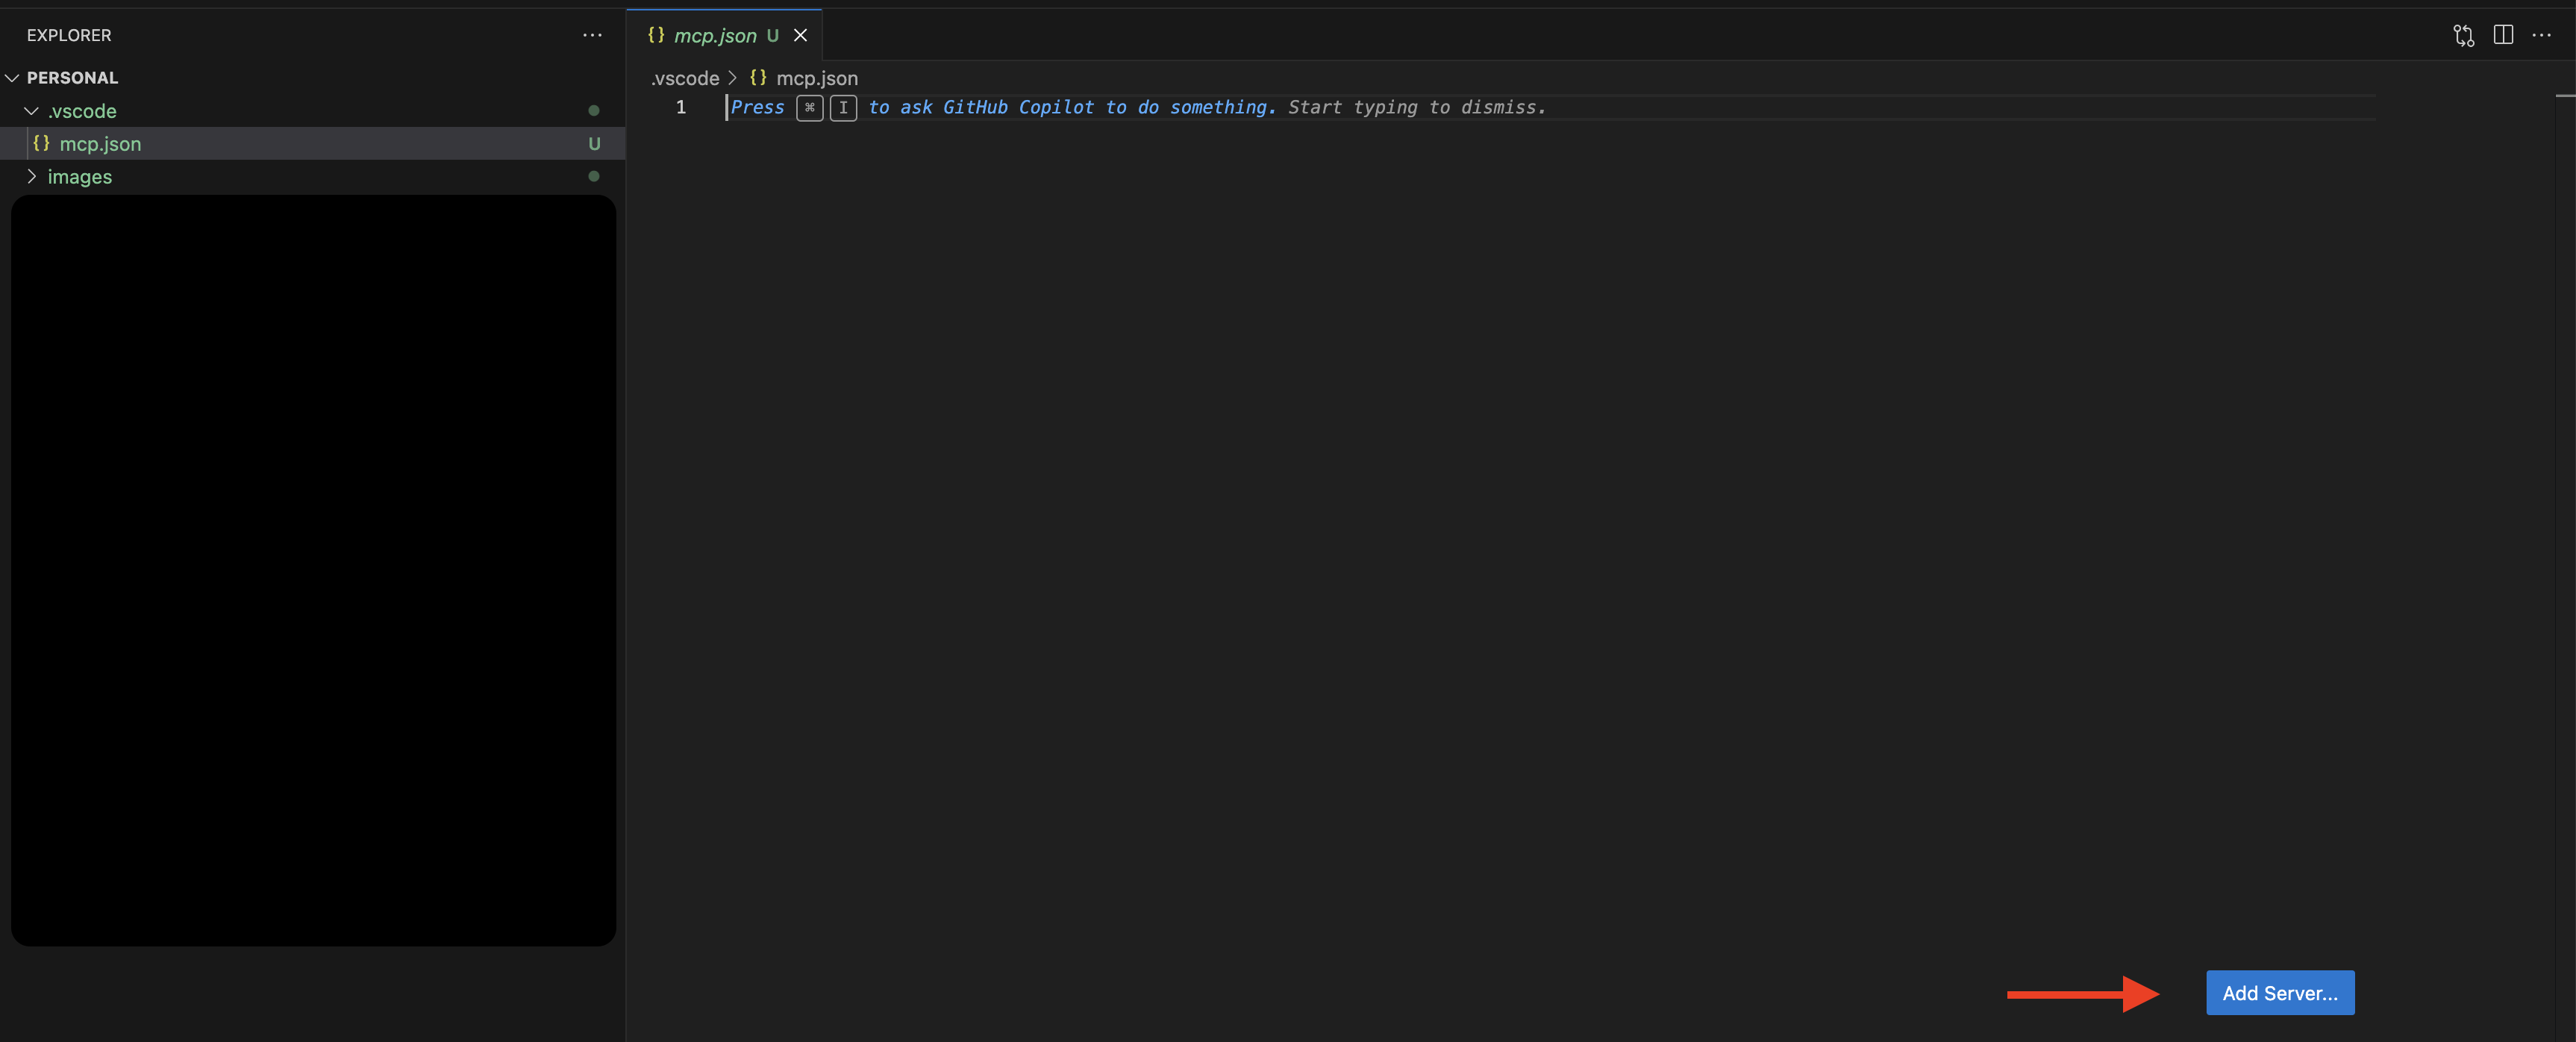
- Configure an MCP server in the
.vscode/mcp.jsonfile in your workspace to share configurations with project collaborators. Make sure to avoid hardcoding sensitive information like API keys and other credentials by using input variables or environment files. You can either clickAdd Serveror just copy and paste the following content to.vscode/mcp.jsonto enable mcp filesystem server.
{
    "servers": {
        "file-system": {
            "type": "stdio",
            "command": "npx",
            "args": [
                "-y",
                "@modelcontextprotocol/server-filesystem",
                "/Users/gyliu513/mcp"
            ]
        }
    }
}
The above configuration means I want to use mcp filesystem server to help me manage the files under /Users/gyliu513/mcp
- After the
.vscode/mcp.jsonconfiguration finished, we can refresh the tools to load all the tools from mcp filesystem server.- From below diagram. we can see we have 9 tools now and there is also a
refreshbutton besides the tools button.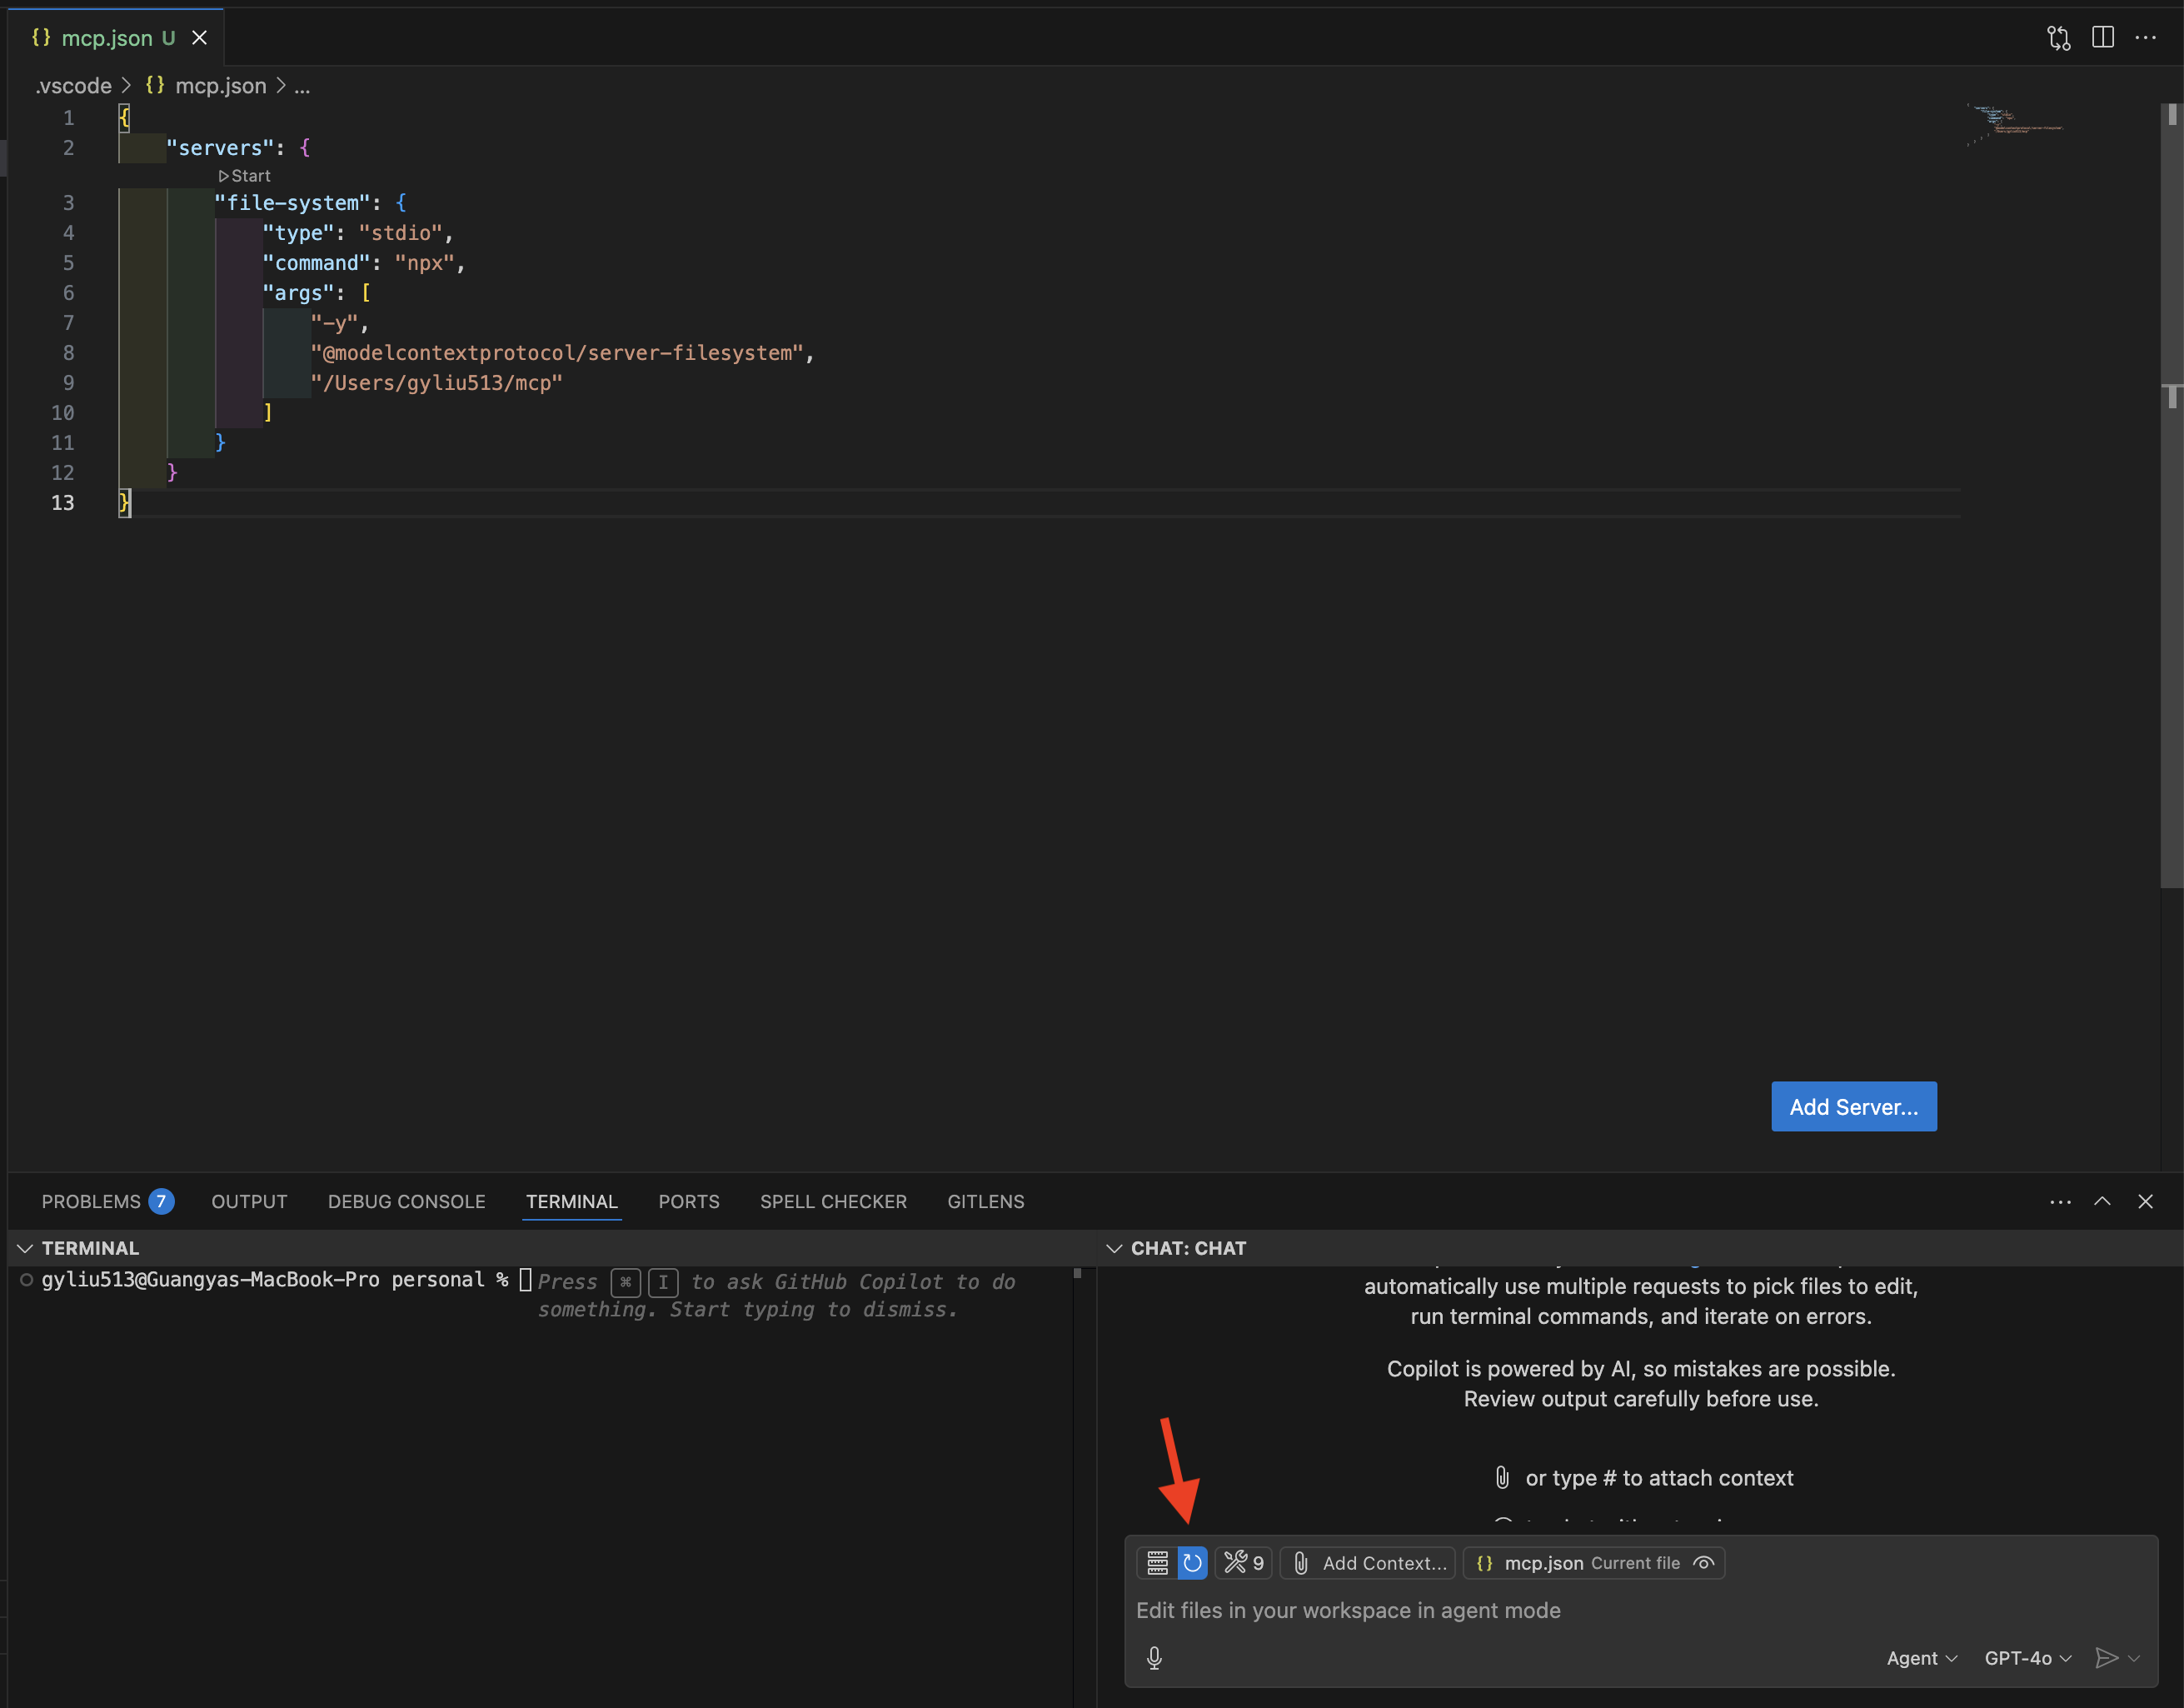
- From below diagram. we can see we have 9 tools now and there is also a
- After click the
refreshbutton, we can see the tools number was increased from 9 to 20, this means the mcp filesystem server has been loaded and it has 11 tools.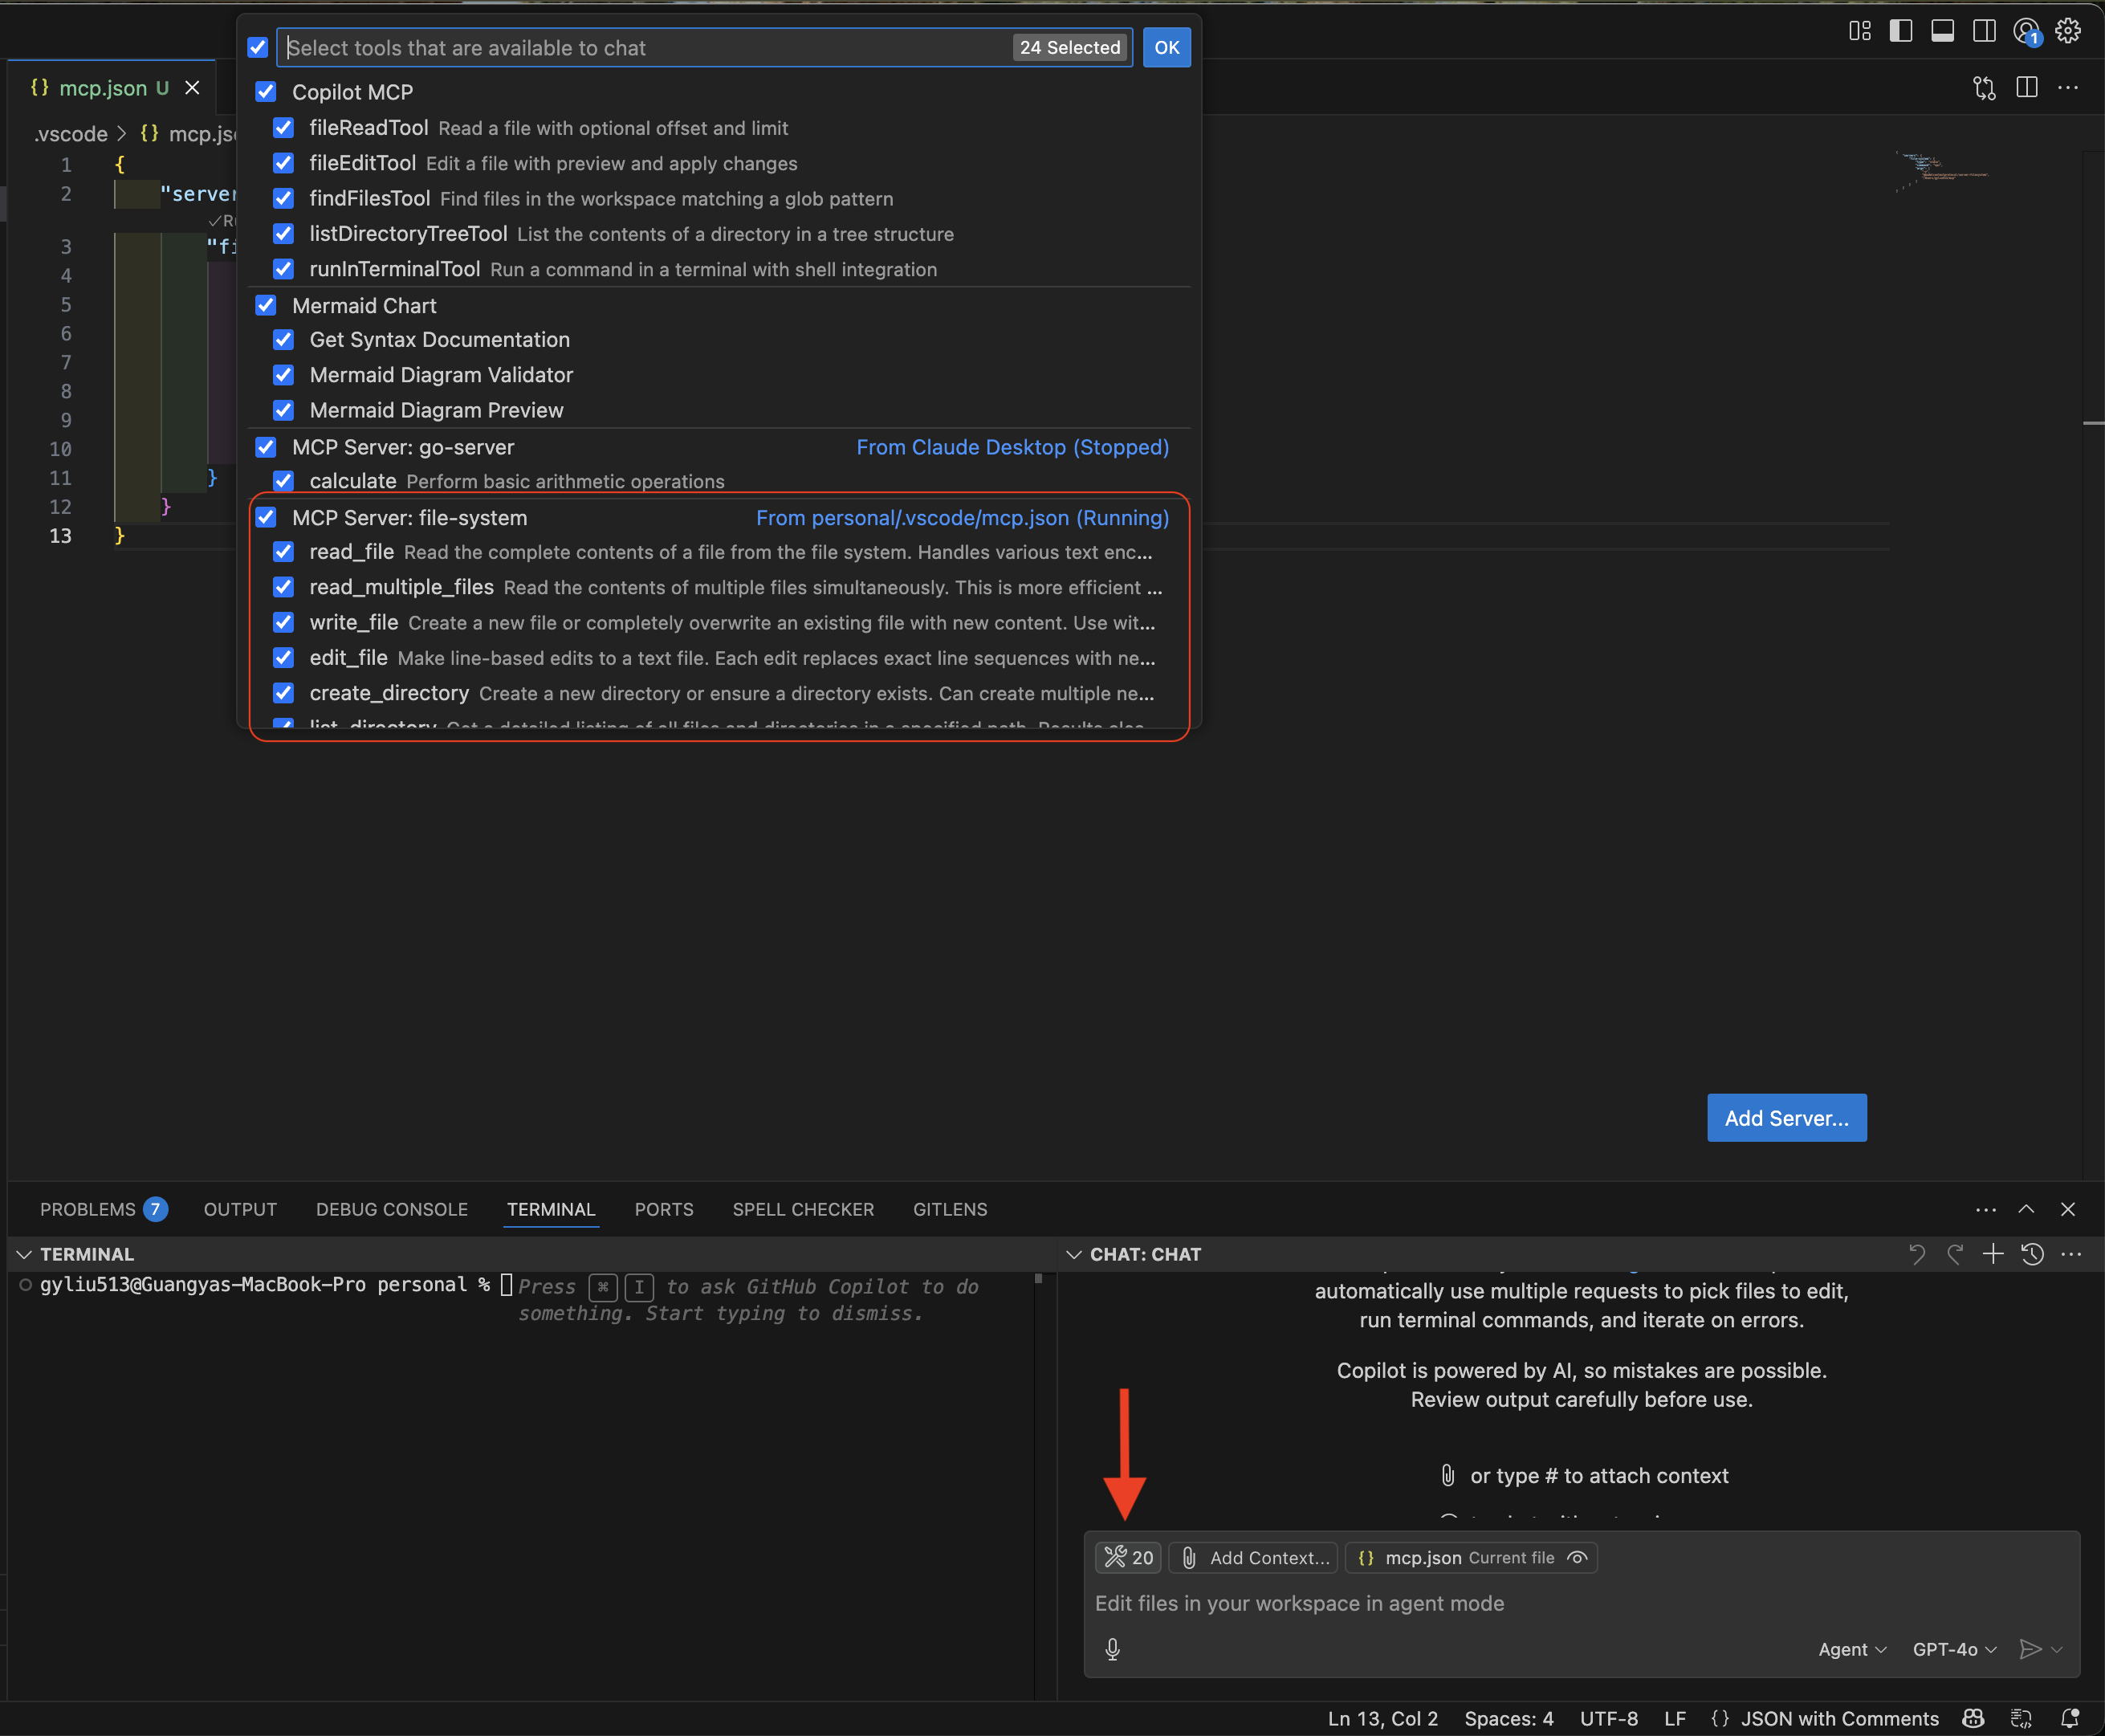
Test MCP Server
OK, all configuration are finished and it is time for some test with the mcp filesystem server using Github Copilot.
- Ask Github Copilot
show me all files under /Users/gyliu513/mcp
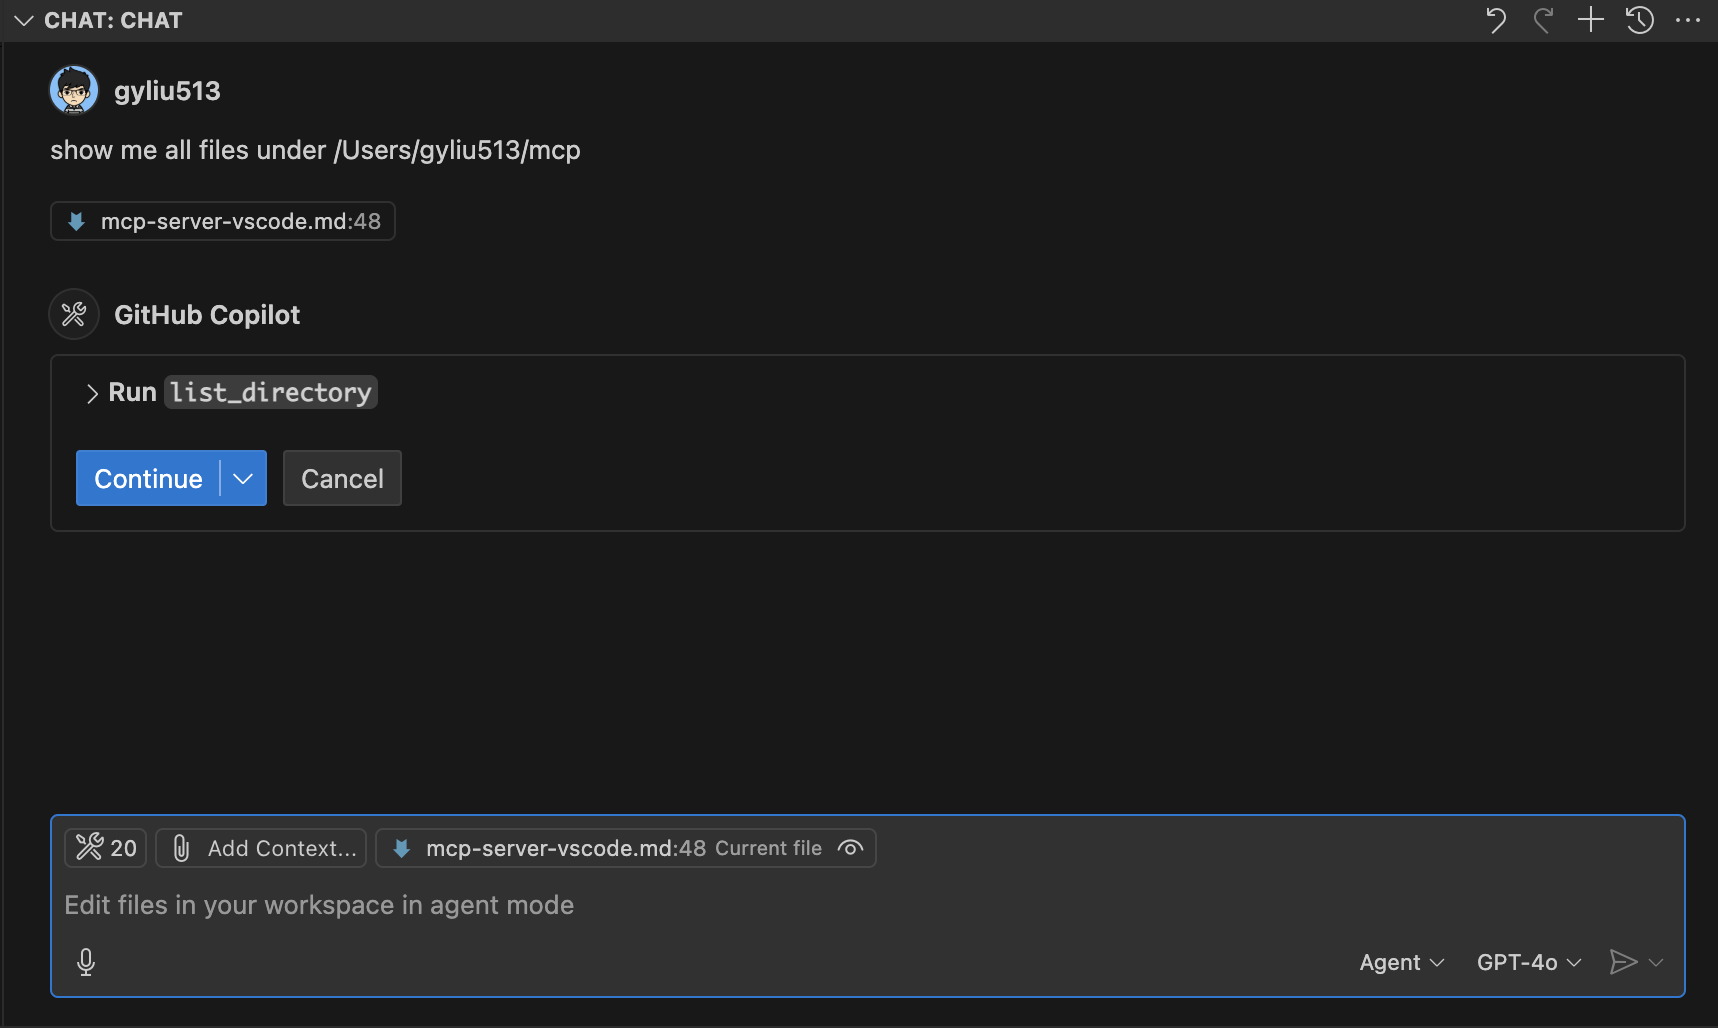
- The tool
list_directorywill be invoked, clickcontinueto enable this tool can be called, you will see the file list under/Users/gyliu513/mcp.

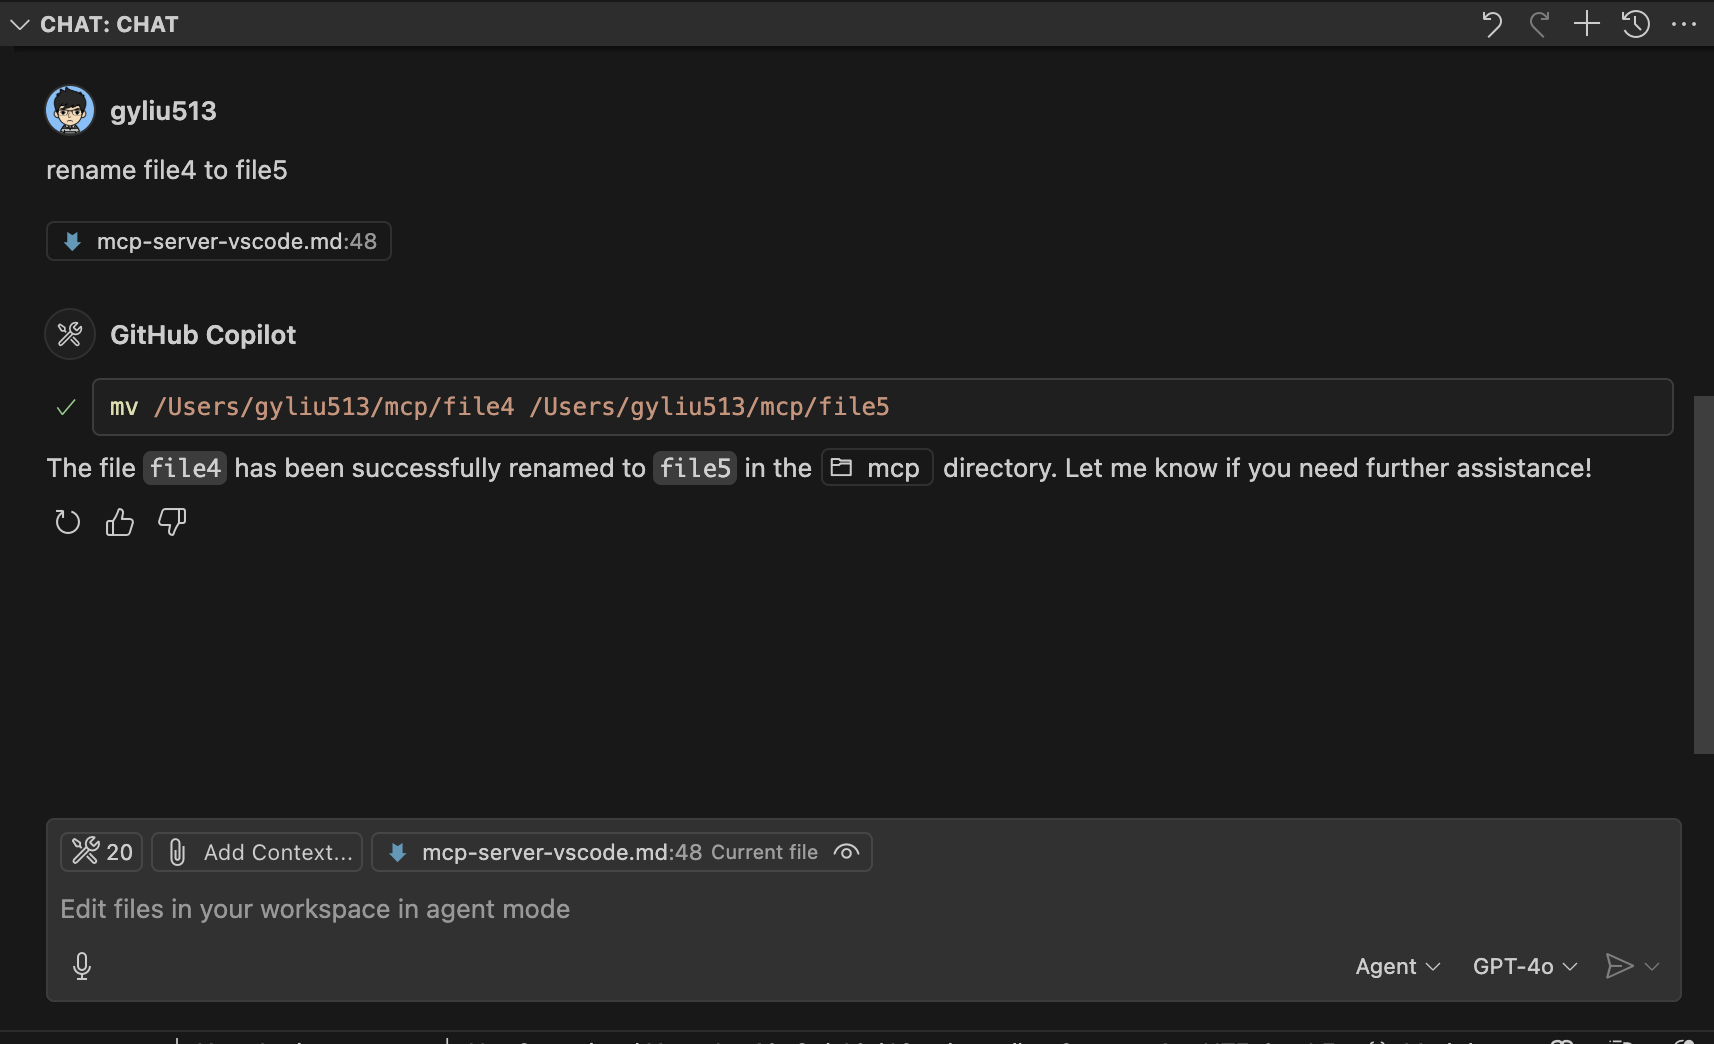
- Ask Github Copilot
rename file4 to file5.
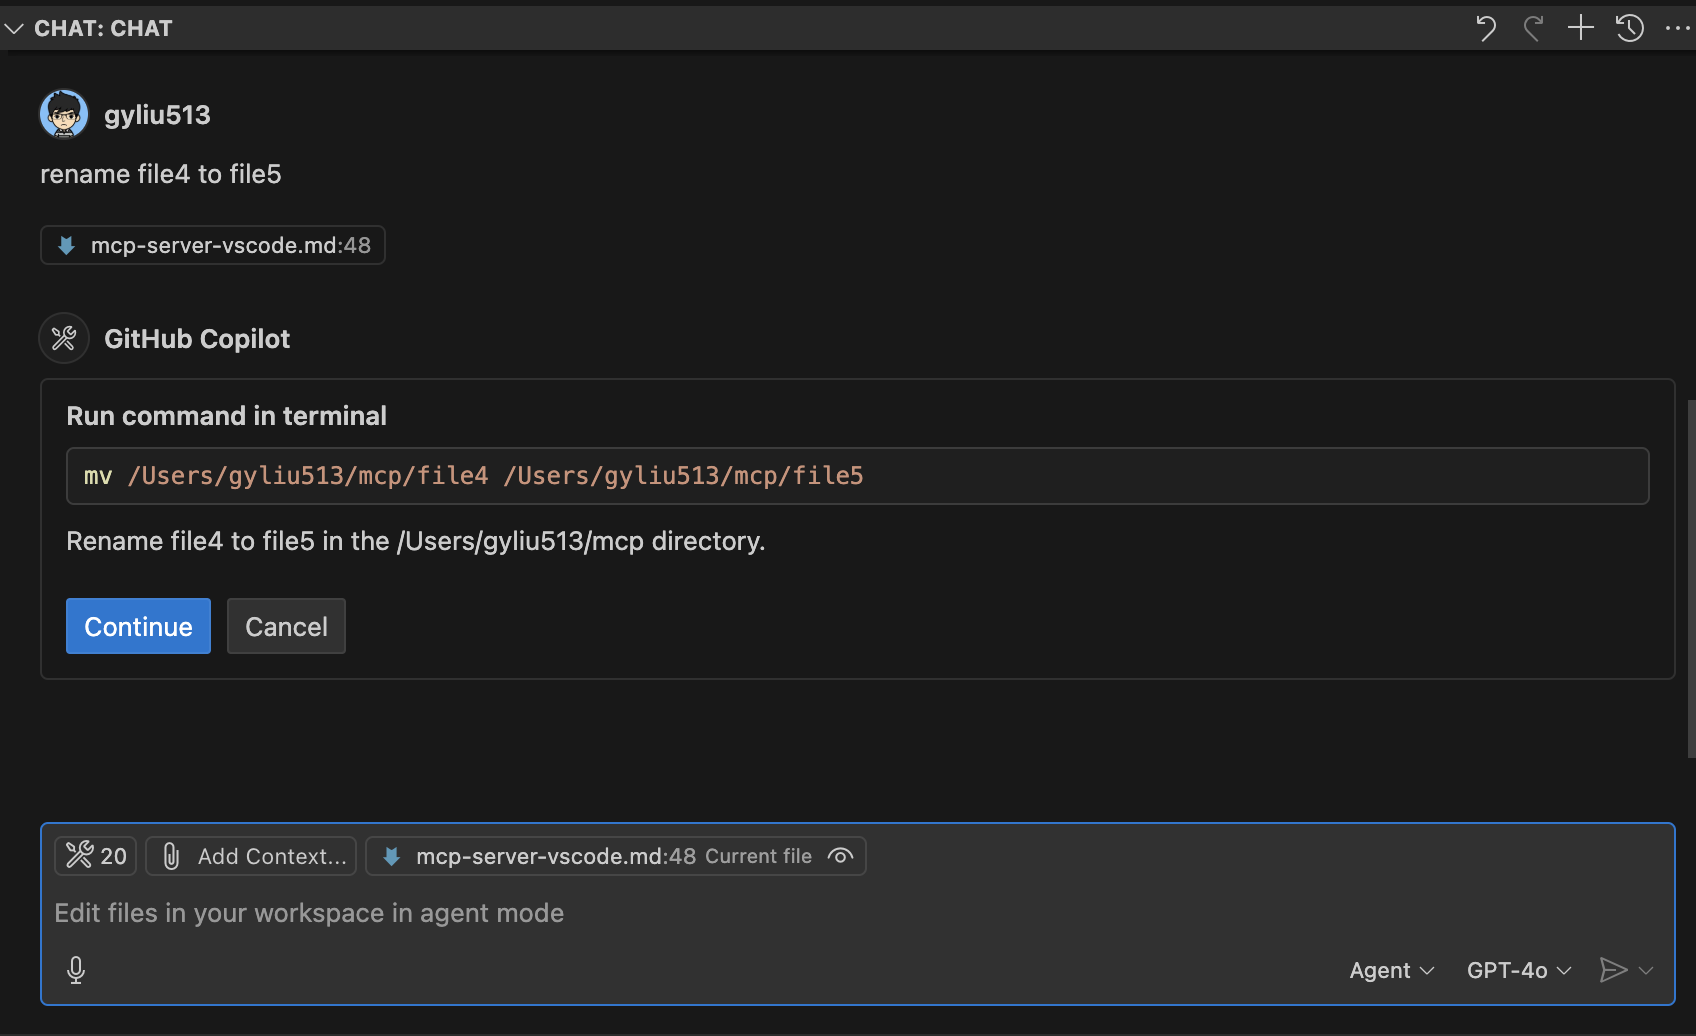
- The tool
mvwill be invoked, clickcontinueto enable this tool can be called, you will see the result isfile4was renamed tofile5.
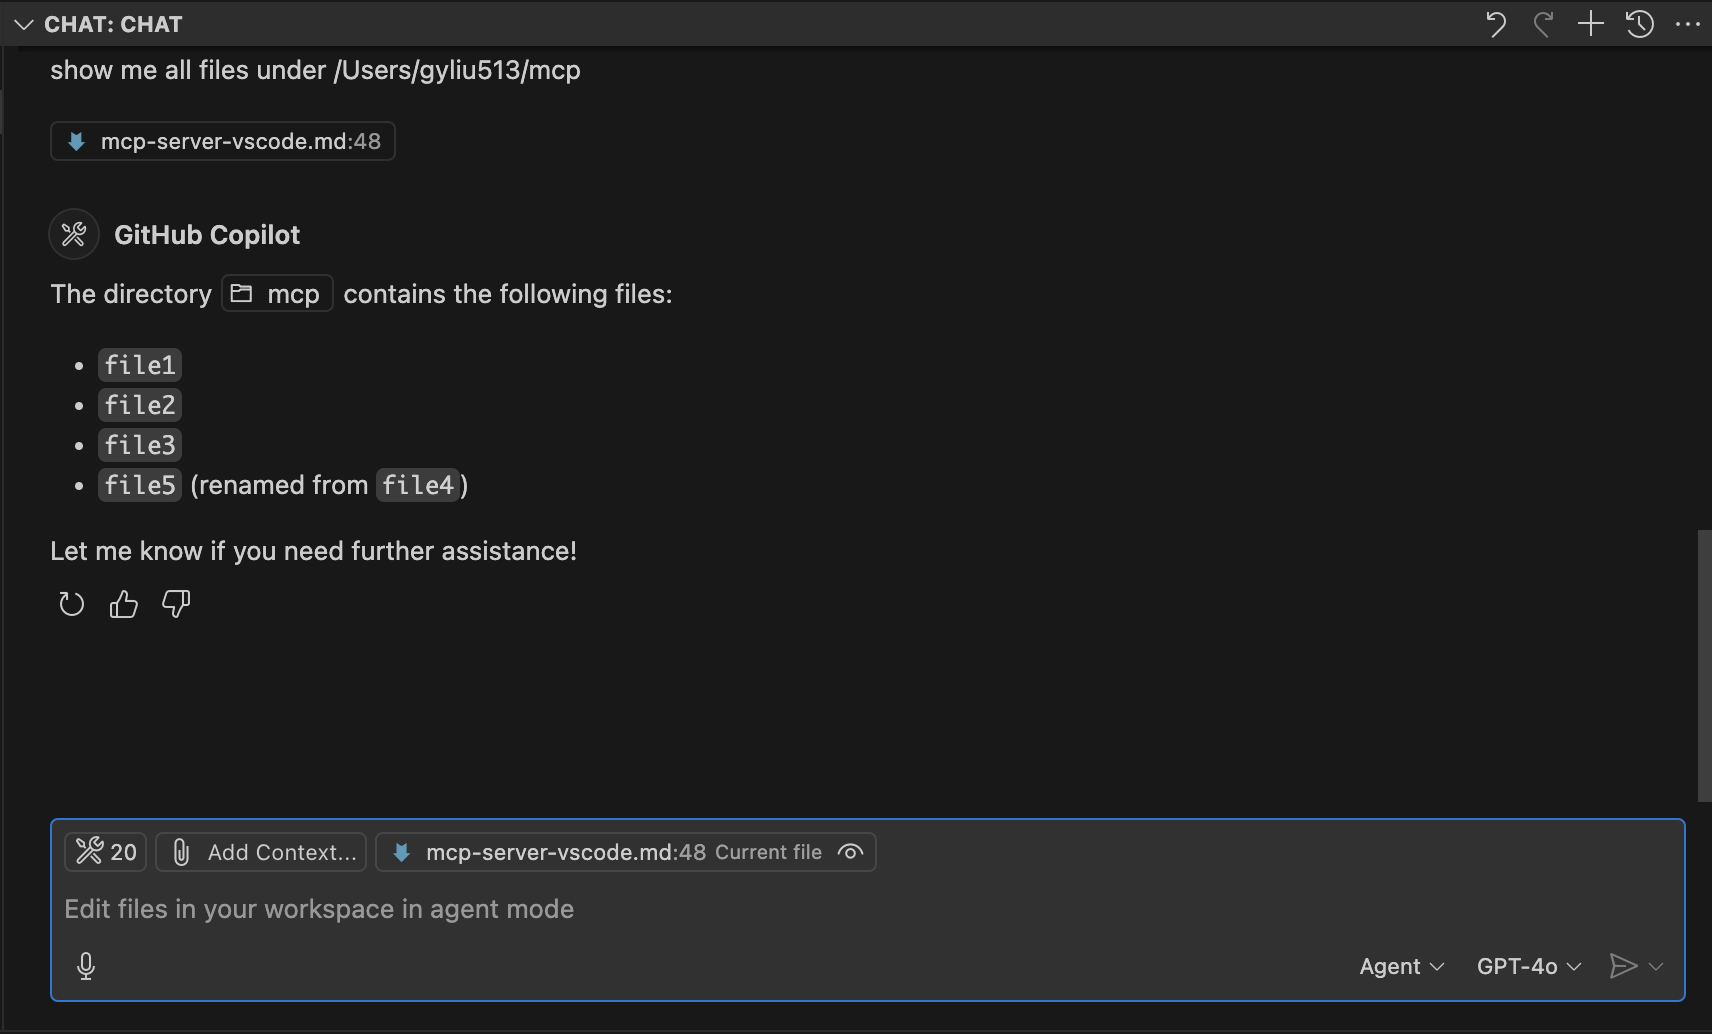
- Ask Github Copilot
show me all files under /Users/gyliu513/mcpto confirm the file has been renamed, you will see the result is right,file4has been renamed tofile5.
Conclusion
With Copilot Chat’s new Agent Mode and support for MCP Servers, developers now have a powerful way to inject custom, domain-specific intelligence directly into their VS Code environment. In this blog, we demonstrated how to configure and integrate the MCP filesystem server to allow Copilot Chat to perform real-time operations—like listing and renaming files—using simple natural language instructions.
This workflow not only boosts productivity but also paves the way for more advanced use cases, such as connecting Copilot Chat to observability tools, internal APIs, or automation engines. And best of all—it’s free and easy to get started.
Happy hacking! 👨💻🚀